Create Princess Papercraft Dolls

Paper dolls have a long and storied history… first published in America in 1812, they exploded in popularity in the early part of the 1900s, thanks, in part, to their publication in many ladies’ and children’s magazines. Over the years, many Disney characters have made their way into paper-doll form—and with today’s craft, you can continue that tradition!

Supplies:
8.5 x 11-inch white cardstock, printable (for face and body)
8.5 x 11-inch white printer paper (for skirt)
Scissors or Exacto knife
Glue stick

  1. Download and print out the first sheet of images (Page 1) onto your cardstock.
  1. Download and print out the other two sheets of images (Pages 2 and 3) onto your regular white printer paper.
  1. With scissors—or an Exacto knife (make sure to use a cutting mat or other appropriate surface)—cut around each image on all three pages. (Make sure to keep the colored tabs on each face and body image, and white tabs marked “A” on each skirt, intact.)
  1. With the pink skirt, apply the glue stick to the marked “A” tab, and then bend the tab around so it meets the other side. Adhere the marked “A” tab to the inside of that opposite edge. (Note: The opening at the top should be smaller than the one at the bottom, forming a “skirt” shape.)
  1. Repeat Step 4 for the two additional (light blue and yellow) skirts.
  1. Insert the tabs located at the bottom of each princess’s face and body image into the top of the appropriate skirt opening—Sleeping Beauty with her pink skirt, Cinderella in her light blue skirt, and Snow White with her yellow skirt. If needed (for sturdiness), apply a dab of glue from your glue stick on the face and body tab and apply to the inside of the skirt.
  1. Enjoy your new papercraft dolls! (Bonus tip: They’d make a great addition to your Christmas village this year… )

NOTE: Cutting—especially with an Exacto knife—should be done by an adult.

An Early Christmas Card from Walt to his Mother

Although young Walter Elias Disney couldn’t afford to purchase elaborate Christmas gifts for his family, the aspiring artist was able to share an even more special and personal holiday gift: his own artwork. This Christmas drawing to Flora Disney, featuring young Walter’s style and humor, became a piece she treasured and kept safely in the family album. While the date this memo was created is unknown, it was most likely done during Walt’s boyhood years in Kansas City.

Print Out Holiday Cards for Charity

The uplifting impact that Disney characters and stories have on kids and families is especially important this time of year. Make like Santa Claus and deliver some Disney holiday magic by printing out these colorful cards, signing your best wishes, and giving them to a local children’s hospital or military care-package organization.

Supplies:
8.5 x 11-inch white cardstock (printable)
Scissors

OPTIONAL:
4 x 4-inch square envelope(s)

  1. Download and print out the greeting card images (Page 1) onto your cardstock.
  1. Cut around each image, using the black line as your guide, to eliminate any white borders.
  1. Fold each card horizontally, along the center (above the images of Mickey and friends).
  2. Write your holiday greetings inside and drop off at your local charity!

OPTIONAL:
Address your envelope(s), affix a stamp, slip your card(s) inside, and send through the mail.

  1. Holiday wishes, delivered!

NOTE: Cutting should be done by an adult.

Historic Three Caballeros Figures Return to Walt Disney World Resort

By Steven Vagnini

As D23 celebrates the tenth anniversary of Gran Fiesta Tour Starring the Three Caballeros—which opened April 6, 2007, in the Mexico pavilion at Epcot—we commemorate the grand return of three beloved Audio-Animatronics® feathered friends on December 4, 2015…

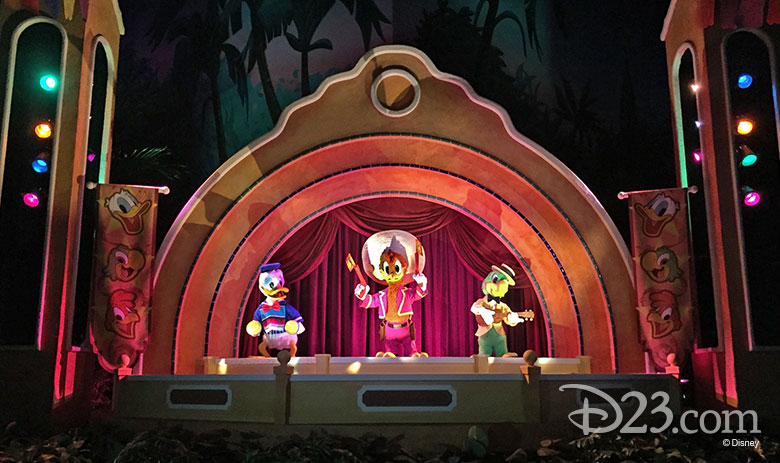
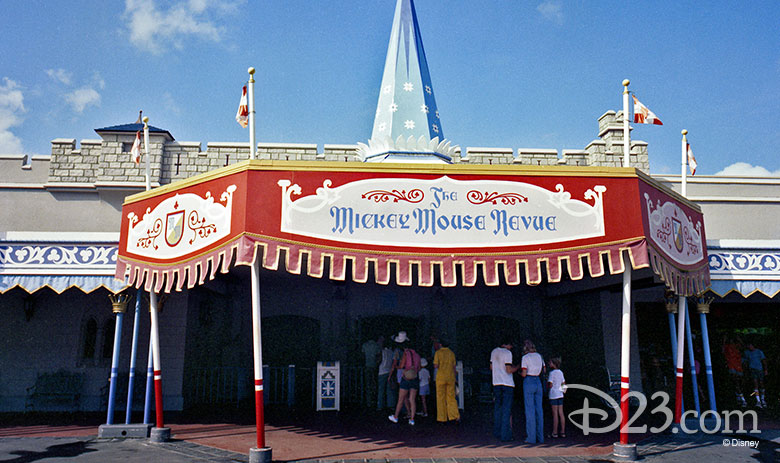
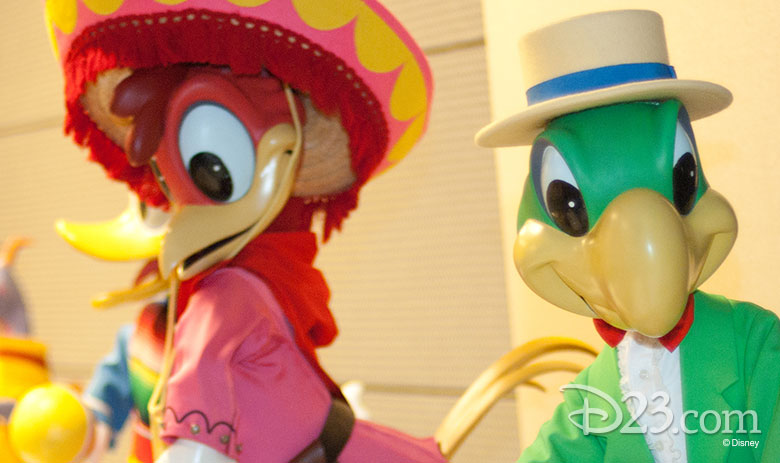
After 35 years on world tour, three historic Audio-Animatronics® figures have returned home to Walt Disney World Resort. Originally premiering in the Mickey Mouse Revue attraction at Magic Kingdom Park on October 1, 1971, and later performing in the same attraction at Tokyo Disneyland, the memorable Panchito, José Carioca, and Donald Duck figures appeared today in the grand finale of Gran Fiesta Tour Starring the Three Caballeros at Epcot. And D23 Members were among the first to see them in action again as part of a special Tweet Meet!

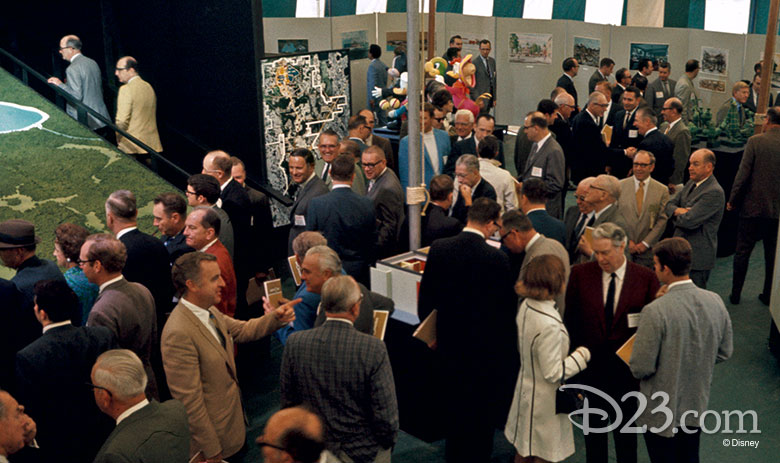
The happy amigos hold a special place in Walt Disney World history, going back to April 1969, when government and media officials gathered in Ocoee for a first glimpse at the long-awaited “Project Florida.” Among the imaginative pieces showcased at the unveiling were concept artwork, a massive scale model of the master plan, figures from the Tropical Serenade attraction… and these happy chappies.

780w-463h_the-three-caballeros-animatronics-1

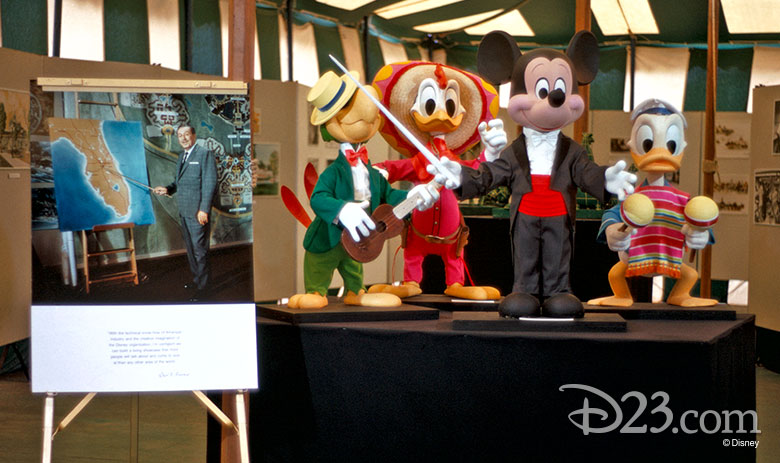
The preview event—which coincided with the first full-scale construction of Disney’s Florida property—affirmed that Walt’s dream was well on its way to magnificent reality. One reporter called the occasion “a shindig like Central Florida had never seen before. . . There could not be a single lingering doubt of their ability to do what they said they were going to do.”

780w-463h_the-three-caballeros-animatronics-2

The Three Caballeros figure models, accompanying maestro Mickey Mouse, represented an attraction first conceived in the mind of Walt Disney that would be totally unique to the Magic Kingdom at its opening.

780w-463h_the-three-caballeros-animatronics-3

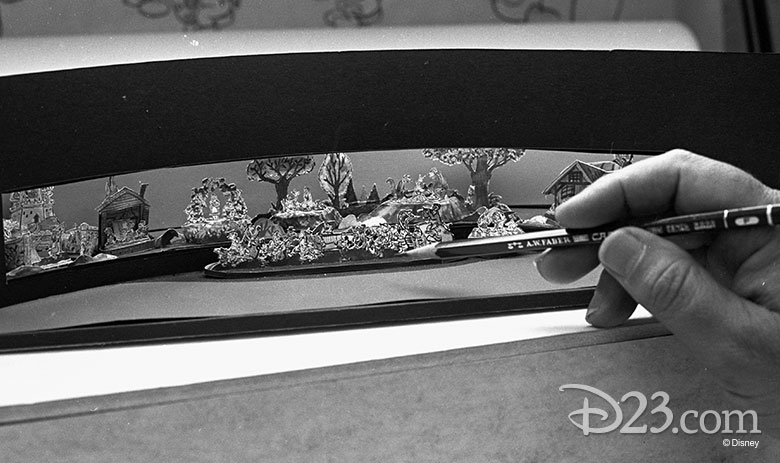
The Mickey Mouse Revue would feature 96 Audio-Animatronics® Disney characters, who performed favorite songs under the baton of show business impresario, Mickey Mouse. The show’s figures were designed and programmed by none other than Disney Legend and animator Bill Justice (pictured below at the controls.)

780w-463h_the-three-caballeros-animatronics-4

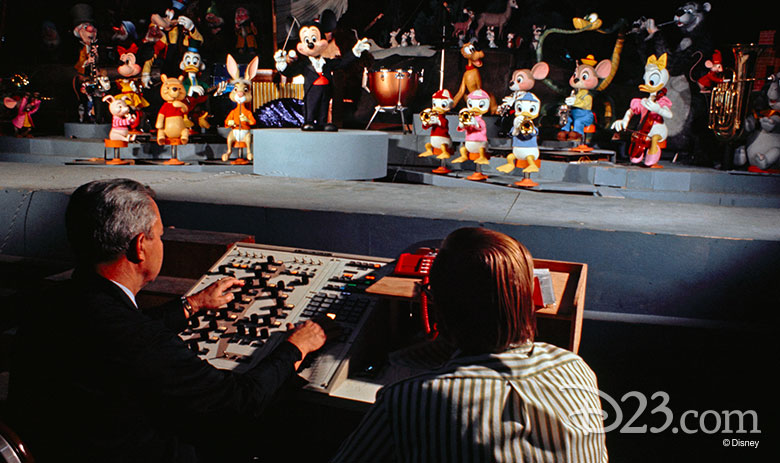
As one of the show’s memorable highlights, the Three Caballeros sang their catchy theme song from their 1944 feature film, magically transporting across the theater with each shot from a pair of pistolas. Then, for the grand finale, all of the characters returned to the stage for an energizing rendition of “Zip-A-Dee-Doo-Dah.”

780w-463h_the-three-caballeros-animatronics-5

The Mickey Mouse Revue closed at Magic Kingdom on September 14, 1980, in preparation for its move to Tokyo Disneyland, where Donald, Panchito, and José returned to the stage for opening day, April 15, 1983. There, the birds of a feather performed for some 26 years, until the final curtain fell to make way for Mickey’s PhilharMagic in 2009.

780w-463h_the-three-caballeros-animatronics-6

Migrating back across the globe, the figures made their next public appearance at Disney’s Contemporary Resort as part of D23’s Destination D: Walt Disney World 40th in May 2011, when the Walt Disney Archives curated a special exhibit honoring four decades of the Vacation Kingdom.

On December 4, 2015, the figures made a grand return to Walt Disney World Resort when they surprised D23 Members and World Showcase guests in the finale of Gran Fiesta Tour Starring The Three Caballeros, where they sing and samba again. To celebrate the occasion, Merchandise Communications Manager Steven Miller and Disney Design Group artist Richard Terpstra joined D23 Members and showcased artwork for a brand new t-shirt released that day via the Disney Parks online store.

780w-463h_the-three-caballeros-animatronics-7-b

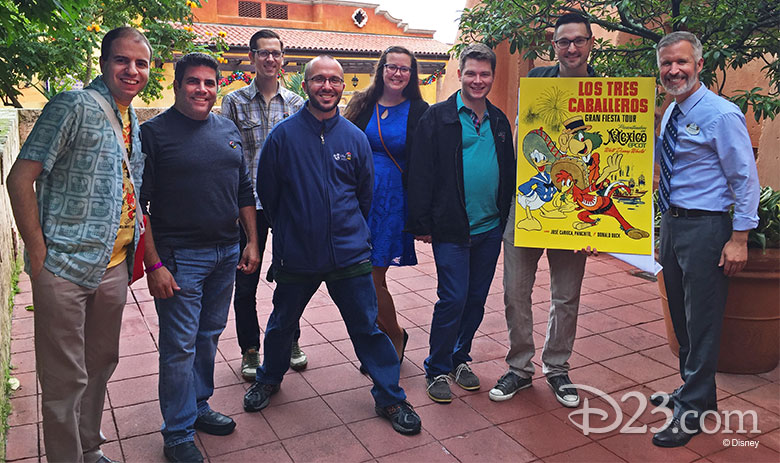
Richard (seen above, second from right) designed the Hanes Nano-T shirt in partnership with the Walt Disney Archives and Walt Disney Imagineering, with special inspiration from an original theatrical poster of The Three Caballeros used in Mexico. The limited edition shirt was available through December 10, 2015.

780w-463h_the-three-caballeros-animatronics-8

Holiday Tips from Parks and Resorts

Is there any place like a Disney park for the holidays? Not to a Disney fan! From the food to the lights to the décor, a day at the parks during the holidays always leaves us trying to figure out how to re-create that holiday magic at home. We went right to the source—our friends from the Disneyland Food & Beverage Concept Development and Resort Enhancement teams—for some tips to make your holidays a little more merry and bright!

780w-463h_holiday-tips-from-parks-and-resorts-gingerbread-house

Q: There are so many gingerbread house-building kits available in stores. What are some fun and easy ways to decorate them so that they feel more unique… and are there any simple ways to make them more “Disney”?
A: Decorating gingerbread cookies, houses, and even hotels, is a lot of fun, and it’s very easy to give them some magical Disney touches with classic holiday candy and even some of your favorite Disney toys.

  • Bringing in a favorite theme is key—by using shredded wheat cereal on the rooftop and pretzels for trim you now have a cottage Snow White and the Seven Dwarfs will love!
  • Mouse ears and “hidden”—and not-so-hidden!—Mickeys are always welcome: Simply take a round candy of one size (peppermints, gumdrops, and such) and top them off with round candies of a smaller size, and, voila—you have an instant Mickey!
  • Another easy way to bring in the Disney theme is to just add a small (appropriate scale) toy figurine of your favorite characters—now they become inhabitants to your creation.
  • Finally, an edible glitter can be found at most cake decorating shops. Around here, we call it Pixie Dust! This final topping will bring a dazzling effect to your creation.

780w-463h_holiday-tips-from-parks-and-resorts-house-decoration

Q: Any recommendations for how to light or decorate the outside of your house so that your friends and neighbors are dazzled, rather than blinded by the light?
A: When it comes to decorating your front yard, there are a lot of ways to make your house the envy of the neighborhood:

  • Lighting: Find a clean way to attach your lighting along the roofline. A good way to do this is to line it along the trim of your house, helping to complement the contours of the exterior.
  • Trees: Decorated live trees are a fabulous addition to any front yard decorations. A nice arrangement of lit live trees makes for a fantastic focal point. When the holiday season is over, the trees can then be planted or donated to your local tree-planting program for Arbor Day.
  • Décor: If you want to use lawn décor, the best way to decide which décor to use is to know what story you want to tell:
  • Create a sweet, Snow White-like atmosphere with wicker deer. Set a tree next to the deer and light it with yellow and blue lights to represent Snow White’s dress.
  • Make a Frozen scene by placing snowmen on the lawn with some faux rocks painted to look like the trolls from the Valley of the Living Rock.
  • Painted wood cutouts are also a great way to decorate your front yard—and are fairly simple to do at home. Create templates to cut out the wood. You can use carbon paper found at art supply stores to transfer the image to the wood, and then paint over the tracing.

Q: What’s an easy way to wrap a present or make a gift look special, especially if you aren’t a natural with paper and scotch tape?
A: No tape? No problem! Two great ways to wrap presents are with fabric or origami.

  • You can use fabric the same way you would use gift-wrap, except the fabric can tie back together on itself which makes for clean lines.
  • Origami is a fun and clever way to wrap presents. Tutorials for both methods can be found online.

780w-463h_holiday-tips-from-parks-and-resorts-tree-decoration

Q: Any suggestions for how to “Disney Bound” your Christmas tree and make it feel Disney-inspired?
A: As you begin planning to decorate a fantastic “Disney Bound” tree, decide first on a theme, story, or character. Use your tree as a blank canvas. Think outside of the box!

  • Single-color ornaments and your lighting are great for color blocking. Color blocking is the best way to set your “background” for the design.
  • Instead of using small ornaments in your tree, use props to describe your theme, story, or character. Use larger, heavier props at the bottom, medium-size in the center of the tree, and the smallest props at the top. Don’t be afraid to make your own props! Toys are also a great way to add to your story and to have all of the family involved.
  • Your tree topper should make a statement and really set your story. Your local craft store has a lot of great supplies to design and create your own topper.

Example:
Theme: Star Wars
Color Blocking with ornaments and lighting: Purple and blue ornaments, cool white mini lights, and some star shaped lights.
Props to use: Yoda doll, Jabba the Hut doll, and star-shaped ornaments. X-wing and Millennium Falcon toys will create a wonderful flight scene on the tree.
Tree Topper: The Death Star! Use foam sphere halves, lights, air-dry clay, and craft paint—all purchased from a craft store. Puncture lights through both sphere halves. Glue the halves together. Use a wooden dowel and puncture through the bottom of the sphere. This is how you will attach the topper to the tree. Use air-dry clay to cover the sphere and to help shape the curves of the Death Star. Once the clay is dry, cover lights with painter’s tape and paint the Death Star Detail. The lights of your Death Star tree topper can plug into the lights you have on the rest of the tree.

Example:
Character: Elsa
Color blocking with ornaments and lighting: Frosted ornaments, blue ornaments, silver and white ornaments (Elsa’s hair), and cool white and blue lighting.
Props to use: A blue and lace tree skirt (Elsa’s cape), snowflake ornaments, and icicle ornaments. Make use of craft supplies to create Olaf and Marshmallow the Snow monster. Hide the two characters in the tree as a surprise for people to find as they are admiring your beautifully designed tree!
Tree Topper: A large snowflake or an acrylic sculpture that resembles an ice sculpture.

Redd Rockett’s Pizza Port Count Down Chicken Fusilli

This delectable entree comes from Redd Rockett’s Pizza Port in Tomorrowland at Disneyland Park.

Makes 4-6 Servings

Ingredients

  • 5 oz. alfredo sauce mix
  • 3 oz. pesto sauce mix
  • 2 cups heavy cream
  • 2 cups low-fat milk
  • 2 cups water
  • 2 oz. grated parmesan cheese
  • 1 oz. sun-dried tomato crumbles, plus a handful as topping
  • 2 lbs. dry fusilli pasta
  • sliced smoked chicken breast

 Directions

  1. Cook pasta until al dente.
  2. In the meantime, in a large saucepan, cook alfredo sauce mix, pesto sauce mix, heavy cream, low-fat milk, water, parmesan cheese, and sun-dried tomato crumbles over low heat, stirring constantly. Once sauce is well combined, remove from heat.
  3. Top cooked pasta with sauce, chicken breast, and sun-dried tomato crumbles.

Enjoy!!

Build a Miles from Tomorrowland Spaceship

Disney Junior’s Miles From Tomorrowland takes kids deep into the universe… exposing them to the wonders of outer space, and the joys of family. Make this spaceship with the little explorers in your life and see where adventure takes you. As Miles might say, it’ll be “Galactic!”

Supplies:
8.5 x 11-inch white cardstock (or heavy, printable craft paper)
Cardboard toilet paper roll
Exacto knife or scissors
Double-stick tape
Hot glue gun

OPTIONAL:
String or ribbon
Single-hole punch

  1. Download and print out both sheets (Pages 1 and 2) of designs.

2

  1. Use scissors to cut along dashed line around the black square (Image 3) on Page 2. Leave the white “window” intact for now.

3

  1. Take the resulting black square and wrap it around the toilet paper roll, using your double-stick tape to attach it to the cardboard.

4

  1. Cut out the white “window” using the Exacto knife—or small, sharp scissors.
  1. Use your Exacto knife or scissors to cut along the dashed line around the main spaceship (Image 1) on Page 1. (NOTE: If using an Exacto knife, make sure to use a cutting mat or other appropriate surface.)

6

  1. With your hot glue gun, put a dab of glue on top of all three white dots seen along the middle of the main spaceship (see photo for detail).

7

  1. Take the toilet paper roll and place it on top of the three hot-glue dots, pushing down slightly to adhere. Make sure the “window” on the roll is facing out, and that both rocket “noses” are facing the same direction (see photo for detail).
  1. Next, use the Exacto knife or scissors to cut out the rocket “flames”—Images 4 and 5 from Page 2—following the dotted line as your guide.

9

  1. Apply a small dot of hot glue at the top of each flame (near the “D23”), and then attach each flame to the inside of the toilet paper roll, on opposite sides (see photo for detail).
  1. Using your Exacto knife or scissors, cut out your rocket-tail piece (Image 2 on Page 1) by following the dotted line as your guide.

11

  1. Apply a small dab of hot glue to front of Image 2 (near the Disney logo); then, bend the piece slightly and apply it to the inside of the toilet paper roll, aligning the top edge with the bottom edge of the “window” (see photo for detail).

OPTIONAL:
Punch a hole at the top of rocket and use some string or ribbon to hang where you like! (Can also be used as a tree topper.)

  1. 3, 2, 1… Blast off!

NOTE: Cutting with an Exacto knife—and any hot gluing—should be done by an adult.

Photographs from the Walt Disney Archives Now Available

In a nondescript building in Southern California, a vast collection of timeless photographs traces the rich history of The Walt Disney Company. From the earliest photo of Walt Disney himself to the latest box office hit, the assemblage of material ranges from humorous and outlandish to the rare and nostalgic.

Comprised largely of original negatives, the roughly four million photos rarely leave their cold storage facilities to see the light of day. With a continued focus on digitizing the treasure trove hidden within the Disney Photo Library, the Walt Disney Archives is offering a special opportunity to own a print from its one-of-a-kind collection.

Photographs from the Walt Disney Archives launched Saturday, December 5, with 25 beautiful digital reproductions that are unparalleled in quality and range of color. A bright white base color and smooth finish allows for the highest quality reproduction. With multiple sizes and frames to choose from, individuals can customize an order to their liking. And throughout 2016, new images will be made available.

120315_photos-from-walt-disney-archives-2

“We are so excited by this opportunity to share our wonderful collection of images in a brand-new way,” says Rebecca Cline, director, Walt Disney Archives. “We have selected some of our very favorite Disney images to share, and we hope that our fans will enjoy having these lovely photographic prints in their own homes—to treasure for years to come!”

120315_photos-from-walt-disney-archives-3

The Walt Disney Company has always been known for its world-class storytelling, but the Company’s own story is now told through this breathtaking collection of images. To learn more about Photographs from the Walt Disney Archives, visit DisneyPhotoArchives.com.

120315_photos-from-walt-disney-archives-4

Disney Artist Holiday Cards Just for D23 Members!

The holiday season is always a time for bringing people together, and for D23 Days of Christmas, we celebrate our own tradition of bringing artists from all over The Walt Disney Company together to share their own special touch of magic with D23 Members! Here are three all-new pieces, created especially for the fan in all of us.

780w-463h_christmas-card-alex-maher

In this nostalgic drawing, Alex Maher, Senior Character Artist at Disney Design Group, reminds us that the Christmas season is a great time for “the best of friends” to spend quality time together. Here, Copper and Tod from The Fox and the Hound (1981) play in the winter snow.

780w-463h_christmas-card-brian-crosby

A Christmas dream can be a dream come true with just that spark in me and you! Brian Crosby, Creative Director, Marvel Themed Entertainment, presents the lovable Figment from Journey into Imagination—who has swapped out his traditional yellow-and-red sweater to celebrate the holidays “Epcot style.”

780w-463h_christmas-card-david-pacheco

This piece, titled “To All of You,” was drawn by Dave Pacheco, Creative Director, Disney Consumer Products, and is inspired by the fondly remembered television program From All of Us to All of You. The show first aired December 19, 1958, and continued for several later Christmas seasons. (Many fans are probably finding themselves humming its memorable song, written by Hazel George and Paul Smith.)

Inside Out Fruit Skewers

Express yourself with these “emotional” fruit skewers! As you assemble them by color, play a word game to share a related feeling—alternating the yellow fruits for Joy, blue for Sadness, green for Disgust, red for Anger, and purple for Fear. It’s a fun and fresh way for the whole family to share the fruity deliciousness inside everybody’s head!

Ingredients

  • Yellow fruit: pineapples or bananas
  • Blue fruit: blueberries
  • Green fruit: honeydew melon or green grapes
  • Red fruit: watermelon, strawberries, or raspberries
  • Purple fruit: purple grapes

Directions

  1. Choose one fruit to represent each character: pineapples or bananas for Joy, blueberries for Sadness, honeydew melons or green grapes for Disgust, watermelon, strawberries, or raspberries for Anger; and purple grapes for Fear.
  2. Cut fruit into one-inch cubes, except for grapes and berries which can be served as they are.
  3. String one fruit of each color onto the skewer in any order you wish.
  4. Repeat step 3 until you have as many fruit skewers as you need.