Create a Babes in Toyland Toy Soldier Craft

A tribute to the famous climactic sequence of the 1961 musical fantasy Babes in Toyland, this holiday craft was originally produced by the Walt Disney Productions character merchandising division and sent out to company and business partners. The imaginative piece invited recipients to create their own miniature holiday display featuring the toy soldier, a Disney icon that swiftly gained popularity in the 1960s and would appear annually in Christmas parades at Disney theme parks.

This toy soldier is sure to bring a vintage Disney touch to your holiday decorations! Is that a trumpet fanfare we hear in the distance? (Feel free to follow the original instructions seen on Page 1 of the downloadable file, or follow ours below.)

Supplies:
8.5 x 11-inch white cardstock (printable)
Scissors

  1. Download and print out both pages (Pages 1 and 2) onto your cardstock. (Note: Page 1 can be printed on regular printer paper, if need be.)
  1. Using your scissors, cut out Images 1, 2, and 3 from Page 2. Then make sure to cut or “push up” any marked slots or tabs. (The slots on the soldier’s boots are a little hard to see.)
  1. Take Image 3 and form a cylinder, placing the cut-out tips in the appropriate slots. Once placed, fold them down to lock.
  1. Fold back Image 2 (vertically, down its center) so that it looks like the drawing marked “2.” on Page 1.
  1. Slide the cylinder formed from Image 3 over the body made with Image 2, locking its shoulders into the appropriate slots.
  1. Place the legs over the turned-up “feet” tabs on Image 1 and lock into the slots cut into the feet on Image 2.
  1. Fold the crease closest to the soldier’s feet up; the next crease, fold down; and the final crease, fold under—creating a small front sign. Lock the tab from the end of Image 1 into its appropriate slot.
  1. Your soldier is ready to guard all your most treasured Christmas goodies!

NOTE: Cutting should be done by an adult.

Lesser-Known Characters from “Enchanted Snow Palace”

In the late 1970s, Imagineer Marc Davis envisioned the “Enchanted Snow Palace,” an attraction that would have transported guests into the icy realms of the Snow Queen with a hypnotizing musical score by composer Buddy Baker. Although Marc’s vision didn’t materialize at a Disney theme park, his masterful concept artwork lives on in the collection of the Walt Disney Imagineering Art Library, where it is carefully preserved and continues to provide inspiration to artists and designers.

Most who have been lucky enough to glimpse these pieces might recall the gorgeous settings of the Snow Palace and its beautiful Queen. But just as Pirates of the Caribbean has its cast of whimsical skeletons and townspeople, and as the Haunted Mansion is host to a company of happy haunts, the “Enchanted Snow Palace” would have introduced its own supporting characters to bring the show to life through a series of clever vignettes.

Courtesy of the Walt Disney Imagineering Art Library, we present several concepts that “could have been,” further showcasing the creative genius of “Walt Disney’s Renaissance Man,” Disney Legend Marc Davis.

780w-463h_snow-queen-gag-sketch-2

In this piece dated April 27, 1977, Marc proposes some miscellaneous characters, including The Three Snowballs (“a cool trio!”) and a penguin entertained by a very small abominable snowman.

780w-463h_snow-queen-gag-sketch-3

Here, one can envision the motion of a cast of musical Snowball Men, whose bodies would have appeared static, but whose legs would telescope up and down on floating icebergs!

780w-463h_snow-queen-gag-sketch-1

“The South Pole Pops” would have featured an orchestra of penguins (sound familiar, Muppet*Vision 3-D fans?) conducted by a maestro seal.

780w-463h_snow-queen-gag-sketch-4

In this piece, Marc lays out a turntable that would have offered fast motion for a group of smiling skating creatures.

780w-463h_snow-queen-gag-sketch-5

Marc’s movement studies for the Snowball Men—who would leap into the air after shooting out of a cave—along with a cast of “snowsliding” animals.

780w-463h_snow-queen-gag-sketch-6

In these vignettes dated August 11, 1977, Marc depicts characters on floating ice… including a penguin who reminds us a little of Pablo, the cold-blooded penguin from The Three Caballeros (1945).

Chicken Crêpes Lilly

In the late 1970s, if you happened to be in Central Florida and wanted a truly special meal, there was one place to go: the Empress Lilly. For 18 years, the regally appointed ship beckoned diners with the finest menu at Walt Disney World. Gourmets, park lovers, romantics all agreed: The Lilly—named in honor of Walt’s first lady, Lillian Bounds Disney—was the place to go.
On April 22, 1995, the Empress Lilly’s three famed restaurants served their last meals, and the boat itself eventually became home to a present-day Walt Disney World favorite, Fulton’s Crab Shack. In remembrance of this bygone treasure, we are featuring the most popular luncheon item on the menu, the Chicken Crêpes Lilly.

Chicken Crêpes Lilly

Serves 6

Crêpes
2 eggs
1 cup flour
¾ cup milk
½ cup water
3 tablespoons melted butter
½ teaspoon salt

Sauce Mornay
5 tablespoons unsalted butter
¼ cup plus 2 tablespoons all-purpose flour
4 cups milk, warmed
½ teaspoon coarse salt
¼ teaspoon white pepper
¼ cup grated Parmesan
½ cup heavy cream

Crêpe Filling
1 tablespoon unsalted butter
5 shallots, finely chopped
12 white button or cremini mushrooms
1 pound cooked, diced chicken breast
⅓ cup sherry
Butter, for brushing pan

For Serving
¼ cup grated Parmesan
Sliced almonds, for garnish
Chopped fresh parsley, for garnish

For the crêpes:

  1. Combine eggs, flour, milk, water, butter, and salt in a blender. Blend until smooth, about 10 seconds. Refrigerate batter at least 30 minutes.
  2. Heat a large nonstick pan over medium heat. Brush a bit of butter in pan, and add about 2 tablespoons batter to pan, swirling to form a thin circle. Cook until light golden brown, about 1 to 2 minutes per side.
  3. Place cooked crêpes on a large plate separated by layers of parchment paper. Repeat with remaining batter.

For sauce Mornay:

  1. Melt butter in a large saucepan over medium-high heat. Add flour, stirring until golden. Slowly whisk in milk, making sure there are no lumps. Add salt and white pepper.
  2. Cook, whisking constantly, until sauce is thickened, about 10 minutes.
  3. Pour half of sauce in a medium heat-safe bowl and set aside to cool completely.
  4. Add Parmesan to remaining half of sauce in saucepan and stir to melt cheese. Set aside to cool completely.
  5. Whip cream with an electric mixer until soft peaks form. Fold cooled portion of sauce with cheese into whipped cream and set aside.

For crêpe filling:

  1. Melt butter in a large sauté pan over medium-high heat. Add shallots and cook until translucent, about 3 minutes. Add mushrooms and cook until softened, about 5 minutes. Add chicken and sherry, cooking until chicken is warm.
  2. Lower heat to low and add portion of Sauce Mornay without cheese. Simmer, stirring often, until mixture is thickened slightly.

To serve:

  1. Preheat broiler.
  2. Place about 2 to 3 tablespoons filling in the center of each crêpe, and roll into a cylinder. Place crêpes, seam-side down in a shallow, ovenproof dish.
  3. Spoon the Sauce Mornay with cheese and whipped cream over crêpes. Sprinkle with Parmesan cheese.
  4. Broil crêpes until golden. Garnish with sliced almonds and chopped fresh parsley.

Cook’s Note: White pepper has a slightly floral flavor, and is used primarily to keep the final dish pure white. Black pepper may be substituted.

Make a Frozen Snowflake Wreath

Do you wanna build a snow… flake wreath? Here’s a Christmas door decoration that’s as fluffy as freshly fallen snow, and as sparkly as Anna’s beloved ice-blue dress! Best to use this wreath on an indoor (or fully covered) door.

Supplies:
8.5 x 11-inch white cardstock (printable)
Styrofoam wreath (recommended: 13.8 inches [or 35 cm])
White and blue tulle (recommended: 40-yard roll of 6-inch width for each color)
Winter-colored (blue/silver/white) Christmas bulb ornaments in varying sizes (1 to 1.5-inch diameter)
Snowflake ornaments in varying sizes (from 3 to 5 inches)
Ribbon
Scissors
Hot glue gun

OPTIONAL:
Small string of battery-operated Christmas lights
Exacto knife

  1. Download and print out the Anna and Elsa image (Page 1) onto your cardstock.

2

  1. Using your scissors, cut along the image’s black outline to eliminate most of white border. (Note the small border above the sisters’ inside shoulders; you may need a pair of smaller scissors, or an Exacto knife, to remove that piece.)

3

  1. Cut both the white and the blue tulle into 16-inch strips. We suggest fully cutting up both rolls; you may not end up using every strip (especially if your Styrofoam wreath is a smaller size), but—as you’ll see—the fluffier the wreath is, the better…

4

  1. Take your strips and tie each one around the Styrofoam wreath, with a double knot—alternating two (2) white with two (2) blue—until it’s nice and full (see photo for details).

5

  1. Towards the end of tying your tulle strips, tie a piece of ribbon, around one foot in length, to the wreath (double-knotting it). You’ll use that ribbon to hang your wreath once you’re finished.

OPTIONAL:
At this point, if you have a small string of battery-powered Christmas lights, wrap them around the wreath—through the tulle—and use glue to affix the battery box to the bottom inside of the ring. (If using hot glue, wait for the glue to cool a bit before pushing the box down; you don’t want to melt the plastic! Alternately, use another strong adhesive like super or Gorilla glue.)

  1. Attach the Anna and Elsa printout to the bottom center of the wreath with hot glue (using it to hide the optional Christmas lights battery box). (See photo for details.)

7

  1. Alternate your different-sized snowflake ornaments and attach them with hot glue around circumference of the wreath—leaving Anna and Elsa uncovered, of course! (See photo for details.)

8

  1. Affix your bulb ornaments on top (and in between) the snowflakes with hot glue. (See photo for details.)

9

  1. “Love Is an Open Door”… especially with this wreath displayed on it! Enjoy!

NOTE: Cutting—and any hot gluing—should be done by an adult.

Holidays at Disney Parks Worldwide—Plus More in News Briefs

Making Merry at Disney Parks Around the World

Well, it’s official—Christmas is around the corner, and we’re fairly certain Santa’s already started loading up his sleigh. But yuletide excitement doesn’t end there: This time of year brings a new layer of magic to Disney Parks, and we’ve got a rundown of the festive entertainment, delicious food, and traditions-in-the-making you’ll find around the globe.

Disneyland Park is hosting the 21st edition of its A Christmas Fantasy parade, and it’s a small world Holiday is resplendent with 60,000 colorful lights. Over at Disney California Adventure, “Disney Viva Navidad! Street Party” returns with a cast of more than 50 performers, and World of Color: Winter Dreams delights audiences once more. On the other side of the country, Walt Disney World’s Magic Kingdom Park boasts its Mickey’s Very Merry Christmas Party (on select evenings) and enchanting entertainment like “A Frozen Holiday Wish.” Epcot’s Illuminations: Reflections of Earth gets a special holiday finale, and the 20th (and final) installment of The Osborne Family Spectacle of Dancing Lights dazzles guests at Disney’s Hollywood Studios.

At Hong Kong Disneyland Resort, Christmas comes early with a special Frozen Christmas tree lighting ceremony; Tokyo Disneyland guests can revel in the Starbright Christmas fireworks spectacular; and Tokyo DisneySea boasts uniquely themed decorations. Not to be outdone, Disneyland Paris welcomes the season with the Disney Dreams! of Christmas fireworks spectacular and a new “Royal Christmas Wishes” show. Even Disney Cruise Line is getting into the spirit with its “Very Merry-time Cruises” featuring “Deck the Holiday” parties and a special atrium tree-lighting celebration.

There’s so much to see and do at Disney Parks during the holiday season… grab a cup of hot cocoa and visit a Park near you!

Mark your calendar with upcoming Disney events

Save the Date!
Be sure to mark these upcoming Disney events on your calendar:

D23 and Walt Disney Archives
December 13
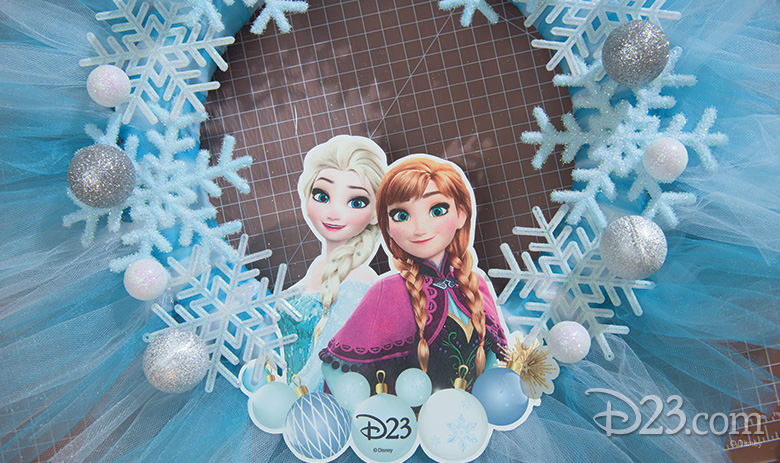
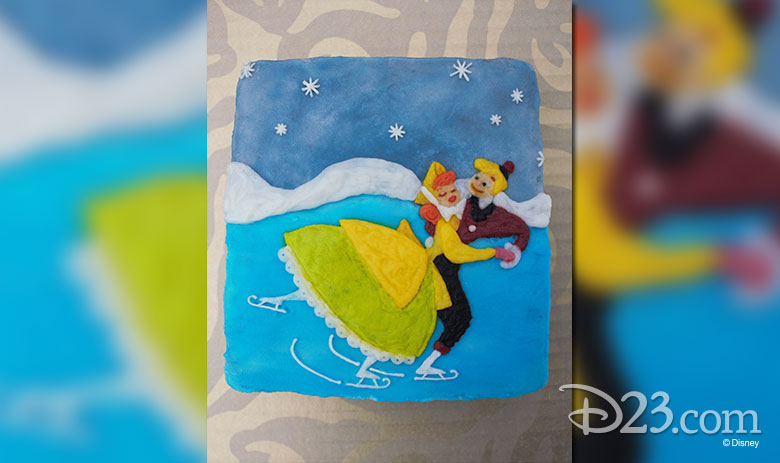
Holiday Gingerbread House Building Workshop

April 20
D23 Member Night at Newsies—On Tour in Portland, Oregon

June 8
D23 Member Night at Newsies—On Tour in Salt Lake City, Utah

Studios
December 18
Star Wars: The Force Awakens opens in theaters.
January 29
The Finest Hours opens in theaters.
March 4
Zootopia opens in theaters.
April 15
The Jungle Book opens in theaters.
May 6
Captain America: Civil War opens in theaters.
May 27
Alice Through the Looking Glass opens in theaters.
Parks
November 8, 10, 12, 13, 15, 17, 19, 20, 29; and December 1, 3, 4, 6, 8, 10, 11, 13, 15, 17, 18
Mickey’s Very Merry Christmas Party at Magic Kingdom Park
January 16
Club Villain at Disney’s Hollywood Studios
Television
December 12
The Wonderful World of Disney Presented by Target Brings You Mary Poppins airs at 8 p.m. ET on ABC.
December 13
Behind the Magic: Snow White and the Seven Dwarfs airs at 8 p.m. ET on ABC
December 25
32nd Annual Disney Parks Christmas Day Parade airs at 10 a.m. ET on ABC
January 19
Marvel’s Agent Carter returns to ABC at 9 p.m. ET

The Legacy Lives On: New Star Wars: The Force Awakens Featurette

Over the weekend, a brand-new Star Wars: The Force Awakens featurette made its debut at Comic-Con Brazil during a presentation hosted by one of the film’s producers, Bryan Burk. Check out the cast and crew as they discuss the legacy of the Star Wars saga, in these last few days before the film premieres!

Star Wars: The Force Awakens stars Harrison Ford, Mark Hamill, Carrie Fisher, Adam Driver, Daisy Ridley, John Boyega, Oscar Isaac, Lupita Nyong’o, Andy Serkis, Domhnall Gleeson, Anthony Daniels, Peter Mayhew, and Max Von Sydow. Kathleen Kennedy, J.J. Abrams, and Bryan Burk are producing with Tommy Harper and Jason McGatlin serving as executive producers. The screenplay is by Lawrence Kasdan & J.J. Abrams and Michael Arndt… and it’s all coming to a theater (galactic and otherwise) near you on December 18.

First Look at Steven Spielberg’s The BFG

Roald Dahl’s beloved 1982 novel The BFG comes to life next summer, directed by the legendary Steven Spielberg! The film stars newcomer Ruby Barnhill as Sophie, a 10-year-old orphan who finds herself on the adventure of a lifetime with a friendly—if dimwitted—24-foot-tall giant (Tony winner Mark Rylance).

Also starring Bill Hader (Saturday Night Live), Jemaine Clement (Flight of the Conchords), and Penelope Wilton (Downton Abbey), The BFG was adapted by the late screenwriter Melissa Mathison (E.T. the Extra-Terrestrial).

Look for The BFG in theaters on July 1, 2016!

120815_news-briefs-december-8-2015-2

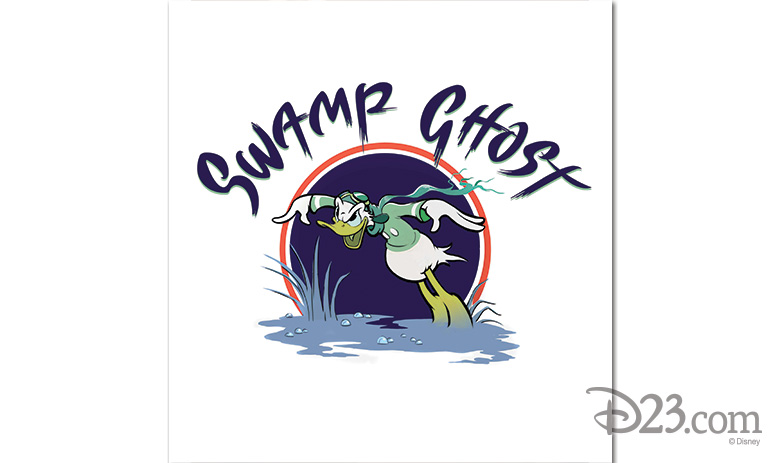
Disney Animators Create Art for “Swamp Ghost” WWII-Era Plane

During World War II, The Walt Disney Studios made more than 1,200 insignia for the United States and Allied forces, many of which featured iconic characters including Donald Duck. To help honor the celebrated WWII-era B17 “Flying Fortress”—affectionately named “Swamp Ghost” for its infamous landing in the swamps of Papua New Guinea—Disney artists Mike Gabriel (director, Pocahontas) and Klay Hall (director, Disneytoon Studios’ Planes) worked with the Pacific Aviation Museum in Honolulu, Hawaii, to create original nose art for the museum’s brand-new “Swamp Ghost” plane display! The announcement of the collaboration was made by former Good Morning America host David Hartman at the museum’s Annual Gala on Saturday, December 5.

“Walt Disney’s Donald Duck was one of the most iconic and likable characters during the 1940s,” says Hall. “He was very popular amongst servicemen, possessing a feistiness with a ‘can-do’ attitude. He seemed like a natural fit for the ‘Swamp Ghost’ nose art.”

A date for the exhibition’s opening will be announced at a later time.

Carrie Fisher (and Gary the Dog) Visit Good Morning America

Actress and author Carrie Fisher is known for her irreverent and entertaining interviews, and a recent chat with co-host Amy Robach on ABC’s Good Morning America (GMA) did not disappoint! Not only did she speak to her experiences working on Star Wars: The Force Awakens and her legacy as Princess (now General) Leia, but she also introduced viewers to her adorable French bulldog, Gary; evidently, it was the sheer awesomeness of the film (which he “watched” at a recent screening) that caused his tongue to, shall we say, “escape” his mouth. “He didn’t look like this before,” Carrie said, generating laughs throughout the GMA studio.

Take a gander at the hilarious interview, above!

120815_news-briefs-december-8-2015-3

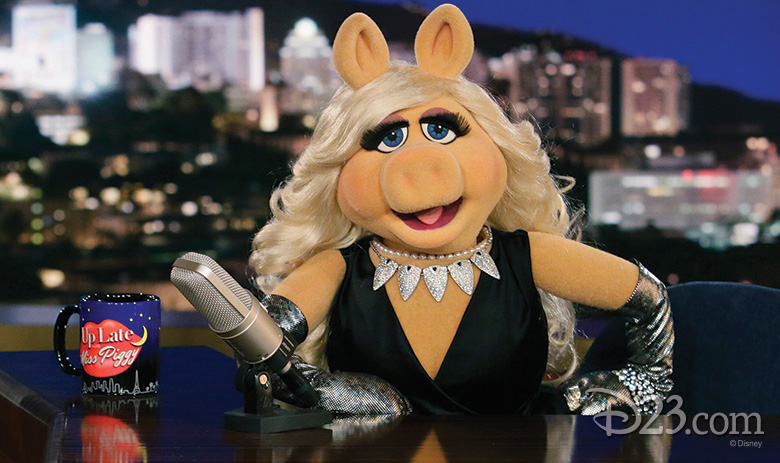
Chat Live with Miss Piggy on Facebook Messenger

Beginning this week, the legendary Miss Piggy will offer her millions of adoring fans a chance to chat one-on-one via Facebook Messenger! The host of Up Late with Miss Piggy (as seen on The Muppets, Tuesdays at 8 p.m. ET/7 p.m. CT on ABC) will be available for live chats Monday, Wednesday, and Friday from 10 a.m. to 11 a.m. PST.

Getting “up close and personal” with her fans (virtually speaking, of course!) is a first for the porcine celeb. “I see this as a gift to all those who love me, who admire me… and who have always dreamed the impossible dream of chatting with me,” says Piggy. “Here’s your chance. Come and get it!”

This truly unique Artificial Intelligence-powered chat experience was created by Disney Consumer Products and Interactive Media Labs, The Muppets Studios, and imperson, a participant in the 2015 Disney Accelerator mentorship and investment program for technology-enabled startups in the media and entertainment space.

Head over to Miss Piggy’s Facebook page to start your own unique conversation with the mega-star!

120815_news-briefs-december-8-2015-4

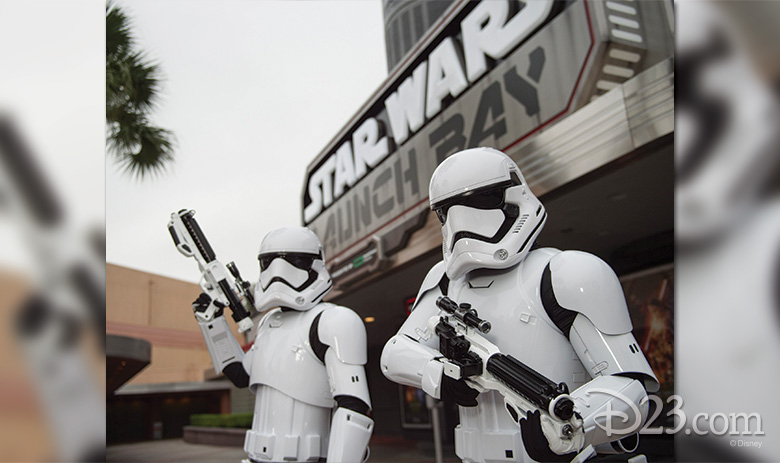
Star Wars Fun at Disney’s Hollywood Studios

For guests at Walt Disney World, the Star Wars galaxy is now closer than ever before! Disney’s Hollywood Studios just unveiled their own Star Wars experiences—on par with Disneyland Park’s recent Season of the Force launch.

Star Wars Launch Bay, located in Animation Courtyard, offers guests the chance to interact with Star Wars characters by choosing to encounter the Dark Side in a Star Destroyer-themed area, or visit with the brave Rebels in a makeshift Rebel Base. Fans can also visit two different exhibits: Celebration Gallery and Celebration Hallway to view iconic ships from the Rebel Alliance and Imperial Navy fleet, as well as replica Star Wars props and murals; and Preview Gallery to explore costumes, artwork, models, and more from the new film. The popular Star Wars—The Adventure Continues attraction is now enhanced with a scene based on Star Wars: The Force Awakens, and fans of the younger persuasion can get in on the fun with Jedi Training: Trials of the Temple.

Plus, don’t miss new Star Wars-inspired food items throughout the park, and look for an all new Symphony In The Stars: A Galactic Spectacular nightly fireworks show beginning December 18. Light speed to Walt Disney World!

Behind the Scenes with The Good Dinosaur Featurette

This new featurette from Disney•Pixar takes us behind the scenes with the filmmakers and the cast of The Good Dinosaur to learn more about Arlo and Spot’s incredible journey. Hear from voice actors Sam Elliott (Butch) and AJ Buckley (Nash), as well as director Peter Sohn and producer Denise Ream.

The Good Dinosaur is in theaters now!

The Ultimate Disney Fan Holiday Sweets

Miniature Disney trains and Monorails circling the Christmas Tree. Mickey Mouse-shaped wreaths decking the halls. Displays depicting favorite Disney characters illuminating the front yard. The holiday season offers many ways for Disney fans to use their decorating skills to bring even more magic to the most wonderful time of the year. And for D23 Member Christy Fragetta, a newly discovered skill of Christmas treat decorating has started a new family tradition for 2015.

780w-463h_once-upon-a-wintertime

Christy has channeled her love for Disney films and theme parks to craft imaginative treats—such as a cookie depicting the romantic outing in Once Upon a Wintertime, the beloved seasonal short from 1948’s Melody Time.

“My first attempt at a Disney-themed treat was back in March of this year,” Christy sys. “Suffice it to say I have seen my fair share of Captain EO showings, and I started thinking that it might be fun to make a Fuzzball cupcake.”

120915_article-fan-source-christmas-cookies-2

Christy gave it a shot and discovered she really enjoyed the activity. Since then, she and her sister have come up with even more ideas, including these festive holiday treats:

780w-463h_ultimate-fan-sweets-toy-soldier

The famous toy soldiers of Babes in Toyland (1961), who also perform in the annual Christmas parades at Disney parks, inspired Christy to design this delicious cupcake.

780w-463h_ultimate-fan-sweets-ferdinand

Ferdinand, star of the 1938 special cartoon Ferdinand the Bull, usually wants to sit around and smell the flowers, so a holiday cookie would, of course, depict the character sniffing poinsettias.

780w-463h_ultimate-fan-sweets-santa

And, finally, Christy picked Santa, from the Silly Symphonies Santa’s Workshop (1932) and The Night Before Christmas (1933), to spread holiday cheer with this jolly cupcake.

What tips does Christy have for fellow D23 Members who want to try out their own treats? “The advice I try to follow myself during the holidays is to keep it simple,” she suggests. “Maybe try incorporating hidden Mickeys when plating your traditional dishes, or adding Mickey ears to gingerbread men and other Christmas cookies. Most importantly, have fun with whatever you do!”

Apple Crisp from Disney’s Grand Californian Hotel & Spa

This delicious dish, which is no longer on the menu, is from the Napa Rose restaurant in Disney’s Grand Californian Hotel & Spa.

Serves 6
Ingredients

For the apple filling:

  • 1 ½ pounds crisp apples, such as Fuji or Braeburn
  • 3 tablespoons unsalted butter
  • ¾ cup sugar
  • ¼ cup fresh lemon juice
  • 2 tablespoons Calvados (apple brandy)
  • 2 teaspoons cornstarch

For the crumble topping:

  • 1 cup all-purpose flour
  • ½ cup sugar
  • ½ cup brown sugar
  • ½ cup oats
  • ¼ cup chopped pecans
  • ¼ cup shredded coconut
  • 3 tablespoons unsalted butter

For the manchego cheese ice cream:

  • 8 egg yolks
  • ¾ cup sugar
  • 2 cups heavy cream
  • 3 cups half-and-half
  • 1 vanilla bean, split lengthwise
  • ½ pound Manchego cheese, cut into 1 inch cubes

 Directions

For the apple filling:

  1. Peel apples and cut into ¼-inch dice. Set aside.
  2. Melt butter in a large sauté pan over medium heat; add sugar, and stir about 2 minutes or until sugar melts.
  3. Add diced apples, and cook about 3 minutes or until apples just begin to soften. Combine lemon juice, Calvados, and cornstarch in a small bowl; stir until cornstarch is dissolved.
  4. Add lemon juice mixture to the pan, and cook about 4 minutes, stirring until juices thicken. Serve warm.

 For the crumble topping:

  1. Preheat oven to 350 degrees F.
  2. Combine flour, sugar, brown sugar, oats, pecans, and coconut in a large bowl; stir until well combined. In a microwave-safe bowl, melt butter. Slowly add melted butter to the bowl, stirring to incorporate.
  3. Pour mixture onto an un-greased cookie sheet, breaking up large clumps with your fingers. Bake 10 to 14 minutes, or until golden brown. Set aside to cool slightly; break up any remaining big pieces to achieve a crumbly consistency.

For the Manchego cheese ice cream:

  1. Whisk together egg yolks and sugar in a large bowl until pale and fluffy; set aside.
  2. Combine cream, half-and-half, and vanilla bean in a medium saucepan over medium-high heat; bring to a simmer. Slowly ladle 1 cup hot cream mixture into egg yolks, whisking constantly. Pour egg-cream mixture back into the saucepan, and cook about 4 minutes, stirring constantly, until mixture coats the back of a wooden spoon. Pour mixture into a large bowl.
  3. Add cheese cubes and stir. Cool to room temperature, stirring occasionally. Once cooled, pour custard through a fine-mesh sieve into a large bowl. Discard cheese and vanilla bean. Refrigerate custard until cold, then freeze in an ice-cream maker according to manufacturer’s instructions.

To serve:

  1. Spoon apple filling into serving dish and sprinkle with crumble topping.
  2. Serve with a scoop of Manchego cheese ice cream on the side.

This recipe has been converted from a larger quantity in the restaurant kitchens. The flavor profile may vary from the restaurant’s version. As a reminder while preparing this recipe, please supervise children who are helping or nearby. All recipes are the property of Walt Disney Parks and Resorts U.S., Inc., and may not be reproduced without express permission. 

Create a Disney’s Descendants Poison Apple Ornament

In Disney’s Descendants, the live-action musical adventure, the worlds of heroes and villains collide like never before! Throughout the course of the Disney Channel film, Evie (Sofia Carson, Austin & Ally)—the daughter of Snow White and Seven Dwarf’s Evil Queen (Kathy Najimy, Hocus Pocus)—finds her own path, outside the footsteps of her wicked mother.

We wondered what Evie’s family Christmas tree might look like… Magical? Check. Something fruit-related? Naturally. Lots of sparkle? Of course! The resulting “poison” apple ornament is sure to bring life to this year’s holiday.

Supplies:
Fake red apple (easily found at your local craft store)
Light green fabric paint
Light green glitter
Dark green glitter
Twine, string, or ribbon
Permanent marker (i.e., a Sharpie)
Paintbrush
Scissors
Butcher paper or plastic tablecloth

OPTIONAL:
Mod Podge clear acrylic spray sealer (or similar)
Decorative D23 gift tags can be downloaded here.

1

  1. Lay butcher paper or plastic tablecloth across your work surface.
  1. With your permanent marker, draw an outline of the eyes and nose (see photos for example). The spookier, the better…

3

  1. Trace the outline of the eyes and nose with the green fabric paint; make it a relatively thick line, if possible. Allow to dry for five to 10 minutes.

4

  1. Next, apply a generous amount of the fabric paint to the top of the apple, letting it drip down and around the dried eyes and nose holes. (The thick lines created in Step 3 should prevent the mixture from dripping inside those areas.) Use the paintbrush to move some of the paint around, if need be.
  1. Every so often, turn the apple upside down (using its stem) to keep the paint from covering up the entire apple.
  1. Let the paint dry for a few minutes.

7

  1. Apply a generous amount of both the light green and dark green glitter around the top of the apple; then, holding its stem, shake the apple a bit so some of the glitter creeps down onto the rest of the paint.
  1. Dry overnight.

OPTIONAL:
The next day, spray entire apple with Mod Podge clear acrylic spray sealer, to better secure the glitter and paint. Allow to dry.

  1. Tie a piece of twine, string, or ribbon to the stem and hang on your Christmas tree! It’ll be positively spooktacular…

NOTE: Cutting should be done by an adult.

A Salute to Santa’s Workshop and the Silly Symphonies

One of the most beloved holiday films in the Disney canon is Santa’s Workshop, a Silly Symphony cartoon first released December 10, 1932, and presented here for D23 Days of Christmas.

The story begins in a distant land, where Santa Claus and a merry band of elves prepare for the famous sleigh ride on Christmas Eve. Outside, the elves are seen brushing the teeth of Santa’s famous reindeer, while inside the jolly man finishes reading the wishes from girls and boys all over the world. Then we find the elves creatively constructing an array of imaginative toys, which come to life and march rhythmically into Santa’s enormous bag. Keep an eye out just before Santa departs; you might even spot what looks to be a Mickey Mouse doll in the sleigh!

The animated short was followed by a sequel, The Night Before Christmas, which was also directed by Disney Legend Wilfred Jackson. Wilfred started at the Disney Studio in 1928 and worked on Steamboat Willie, pioneering methods of pre-timing animation with sound. He would go on to sequence direct 11 Disney features and serve as producer-director of the Disneyland television series.

Santa’s Workshop was the 33rd of the Silly Symphonies, a series of groundbreaking short subjects that helped refine the art of animation and pave the way for the animated feature. Here to tell us more about the series is film critic Leonard Maltin, who hosted Disney in Concert: A Silly Symphony Celebration at D23 EXPO 2015.

Brandy Snaps

Enjoy this recipe for Mary Berry’s Brandy Snaps, courtesy of The Great Holiday Baking Show. It’s the perfect holiday sweet treat!

Watch The Great Holiday Baking Show Mondays in December on ABC.

INGREDIENTS:
Brandy Snaps
Makes 16
4 tbsps. unsalted butter
¼ cup light brown sugar, packed
¼ cup golden syrup
3 Tbsps plus 1½ tsps. All purpose flour
½ tsp. ground ginger
½ tsp. lemon juice

Quick Eggnog
¼ cup whole milk
¼ cup heavy whipping cream
1 large egg
2 tsps. granulated sugar
¼ tsp. freshly grated nutmeg
1 tbsp. brandy

Eggnog Cinnamon Whipped Cream
2 cups heavy whipping cream
2 tbsps. powdered sugar
½ tsp. vanilla extract
1 tsp. ground cinnamon
½ cup eggnog

INSTRUCTIONS:
Brandy Snaps

  1. Preheat the oven to 180C/350F. Line four baking sheets with parchment paper. Oil a 1-inch-thick handle of a wooden spoon, and set it aside on a cooling rack.
  2. Add the butter, sugar, and syrup to a small, heavy bottomed sauce pot.
  3. Heat gently until the butter has melted and the sugar has dissolved—about 15 minutes over low heat. Be careful not to let the mixture boil, as this may cause crystallization. To check when the sugar has dissolved, stir occasionally, pulling the spoon across the bottom of the pan until you can no longer hear the gritty granules being scraped along and most of them have disappeared.
  4. Remove from heat and allow mixture to cool for 2-3 minutes. Sift in the flour and ginger. Pour in lemon juice, and whisk until smooth. Use a teaspoon to dollop 4 heaping scoops of batter onto each prepared baking tray, giving you 16 total circles. Make sure to leave about 4 inches in between each brandy snap, as they will spread during baking.
  5. Bake for about 7 minutes or until the mixture is well spread out, appears lacey, and is a golden brown color. Remove from oven, and allow the brandy snaps to firm up slightly. You need to work quickly to shape the brandy snaps once they are cooled for about 2 minutes. Using an offset spatula or fish spatula, lift the brandy snaps one at a time from the parchment. The mixture needs to be firm enough to remove, but pliable enough to shape. Check by releasing around and under the edges with a small offset spatula.
  6. Quickly roll a circle of the warm mixture around the handle of the wooden spoon, having each end join underneath. Press gently to create a tube—it will overlap to create a smooth surface. Slide the brandy snap off the spoon and leave it to firm up on the wire rack, seam side down. Repeat process with remaining brandy snaps. If any of the circles on the sheet harden too much to work with, put them back in the oven for a few seconds to soften again. Bake the trays of brandy snaps one at a time. This will allow you to work quickly with the circles that are ready. If they sit too long, they won’t be easy to work with.
  7. Once brandy snaps have cooled completely, about 5 minutes, they are ready to be filled. Fill each brandy snap with the Eggnog Cinnamon Whipped Cream using your star-tipped piping bag. Fill each side of each brandy snap, starting from the center and pulling out towards the end. Be careful not to crack the brandy snaps. Once filled, serve immediately or chill.

Quick Eggnog

  1. In a medium bowl, add all ingredients except brandy.
  2. Using an immersion blender, blend mixture together for 3-5 minutes until thickened and bubbly. Whisk in brandy. Set aside until ready to use.

Eggnog Cinnamon Whipped Cream

  1. Add heavy cream to a large metal bowl. Whisk for 2-3 minutes, until soft peaks begin to form.
  2. Add in sugar, vanilla, and cinnamon. Whisk until stiff peaks form, about 1 minute.
  3. Gently whisk in eggnog. Place filling into a piping bag with a large star tip. Chill until ready to use.

Notes:

  1. The mixture cools quickly when scooping it onto the prepared baking sheets. Work quickly to get the mixture on the baking sheets. If it hardens, place back over low heat to soften and make pourable again.
  2. Mixture makes 16 brandy snaps. (1 heaping tsp. each.)
  3. Can also spray 1-inch handle with cooking spray instead of rubbing it with oil.

Hazards to Watch Out for:

  1. If the mixture boils on the stove, it causes crystallization of your brandy snap batter. This will lead to a rough brandy snap with potential crispy, hard sugary pockets in your snaps.
  2. Once the batter is made, it needs to be spooned onto the prepared baking sheets quickly or else it needs to be reheated to spoon out. To reheat it after the flour is added, you risk cooking it too much or changing the whole batter.
  3. Keep a close eye on your brandy snaps! They burn quickly. If the snaps get too dark in the oven, it will create a bitter flavor. They might look a beautiful dark golden brown but make sure they do not get TOO dark. If they do, you will not be able to get rid of that bitter flavor and you should redo the whole bake.
  4. To create 16 uniform circles is next to impossible because of the spreading that happens. Definitely try to create the most uniform circles you can, but know they will likely not all be exact.
  5. When forming the brandy snaps, be careful not to break them. Once they are set, sliding them off the spoon is challenging as they crack easily being so lacey and delicate.
  6. Take care while making the eggnog. If you don’t blend it long enough, it will be too thin and ruin your whipped cream.
  7. If the whipped cream filling becomes over-whipped, it can have the consistency of butter. We want a light and airy mixture to complement our light and airy brandy snaps!

D23 Day of Christmas 2017 back to home banner