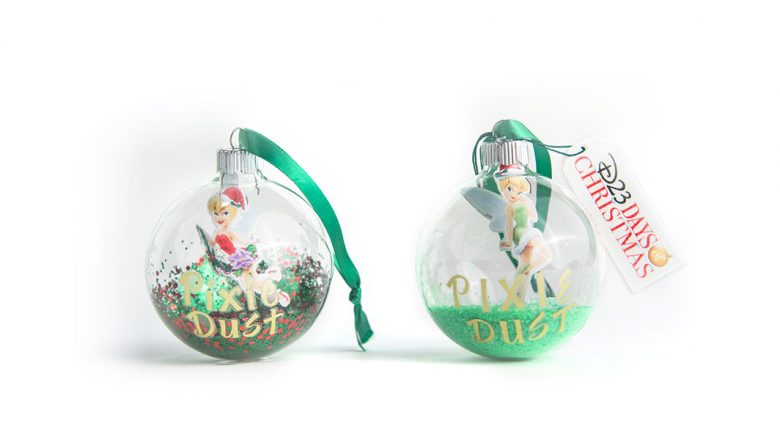
If you want to add a little “pixie dust” to this year’s Christmas tree, look no further than our Tinker Bell ornament! Feel free to personalize this ornament by using your favorite colors—for the glitter and sequins, for the sticker letters, and even for the confetti snowflakes. Just make sure you use a clear bulb, so you can see all of Tink’s magic inside!
Supplies:
8.5 x 11-inch white printer paper
3.25-inch round clear glass ornament(s)
Glitter (holiday colors of your choosing)
Confetti snowflakes (white, or holiday colors of your choosing)
Ribbon
Sticker letters, under 1-inch in size (found in scrapbooking section of craft store)
Monofilament (fishing line or jewelry “illusion cord”)
Glue stick
Scissors or Exacto knife
OPTIONAL:
Small funnel
Sequins (holiday colors of your choosing)
- Download and print out the two Tinker Bell images (Page 1) onto a piece of regular printer paper.
- Using scissors, or an Exacto knife (make sure to use an appropriate cutting surface), cut both Tinks out along their grey outlines—leaving only a small white border around each image. (NOTE: You don’t have to make two ornaments; feel free to choose which Tink you like most!)
- Remove the ornament cap and—either with your (optional) funnel, or by creating a funnel from a piece of paper—pour your glitter into the bottom of the ornament, filling it to about a quarter full. (Use one color, use several… it’s up to you!)
- Slightly bending each confetti snowflake, insert several into the ornament so that they lay on top of the bed of glitter.
OPTIONAL:
Alternately—or even in addition to (the sparklier, the better!)—pour some holiday-colored sequins into the ornament.
- Using scissors, cut approx. 7 inches of monofilament.
- Tie a small knot at the end of your piece of monofilament. Then, using the glue stick, cover one side of printout (white side up) with glue. Align the string along the center of the glued side, with the knot at the bottom near Tinker Bell’s feet (just outside of the cutout). Fold the opposite side over—at the middle point between the wings—and press together; both sides should now match. Trim excess line from the bottom of the cutout, if desired.
- Slightly bend your Tink cutout (or lightly wrap it around a pencil) and place into the ornament, leaving remaining monofilament free on the outside of the bulb.
- Pull the top of the monofilament line through one hole on the ornament cap and tie it to looped wire hanger and then replace the cap, leaving Tinker Bell “dangling” into the glitter.
- Affix the sticker letters to spell “PIXIE DUST” on the outside of the ornament.
- Tie a piece of ribbon to the ornament’s looped wire hanger, and place on your tree.
- It’s like your very own (and very Christmas-y) “second star to the right”! Enjoy!
NOTE: Cutting—especially with an Exacto knife—should be done by an adult.


