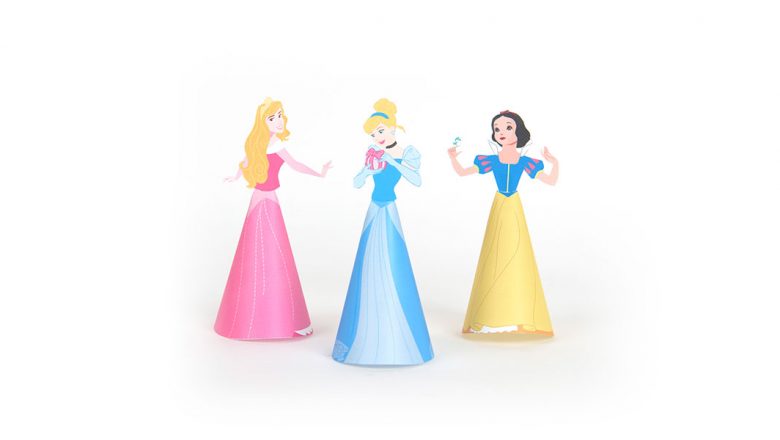
Paper dolls have a long and storied history… first published in America in 1812, they exploded in popularity in the early part of the 1900s, thanks, in part, to their publication in many ladies’ and children’s magazines. Over the years, many Disney characters have made their way into paper-doll form—and with today’s craft, you can continue that tradition!
Supplies:
8.5 x 11-inch white cardstock, printable (for face and body)
8.5 x 11-inch white printer paper (for skirt)
Scissors or Exacto knife
Glue stick
- Download and print out the first sheet of images (Page 1) onto your cardstock.
- Download and print out the other two sheets of images (Pages 2 and 3) onto your regular white printer paper.
- With scissors—or an Exacto knife (make sure to use a cutting mat or other appropriate surface)—cut around each image on all three pages. (Make sure to keep the colored tabs on each face and body image, and white tabs marked “A” on each skirt, intact.)
- With the pink skirt, apply the glue stick to the marked “A” tab, and then bend the tab around so it meets the other side. Adhere the marked “A” tab to the inside of that opposite edge. (Note: The opening at the top should be smaller than the one at the bottom, forming a “skirt” shape.)
- Repeat Step 4 for the two additional (light blue and yellow) skirts.
- Insert the tabs located at the bottom of each princess’s face and body image into the top of the appropriate skirt opening—Sleeping Beauty with her pink skirt, Cinderella in her light blue skirt, and Snow White with her yellow skirt. If needed (for sturdiness), apply a dab of glue from your glue stick on the face and body tab and apply to the inside of the skirt.
- Enjoy your new papercraft dolls! (Bonus tip: They’d make a great addition to your Christmas village this year… )
NOTE: Cutting—especially with an Exacto knife—should be done by an adult.


