
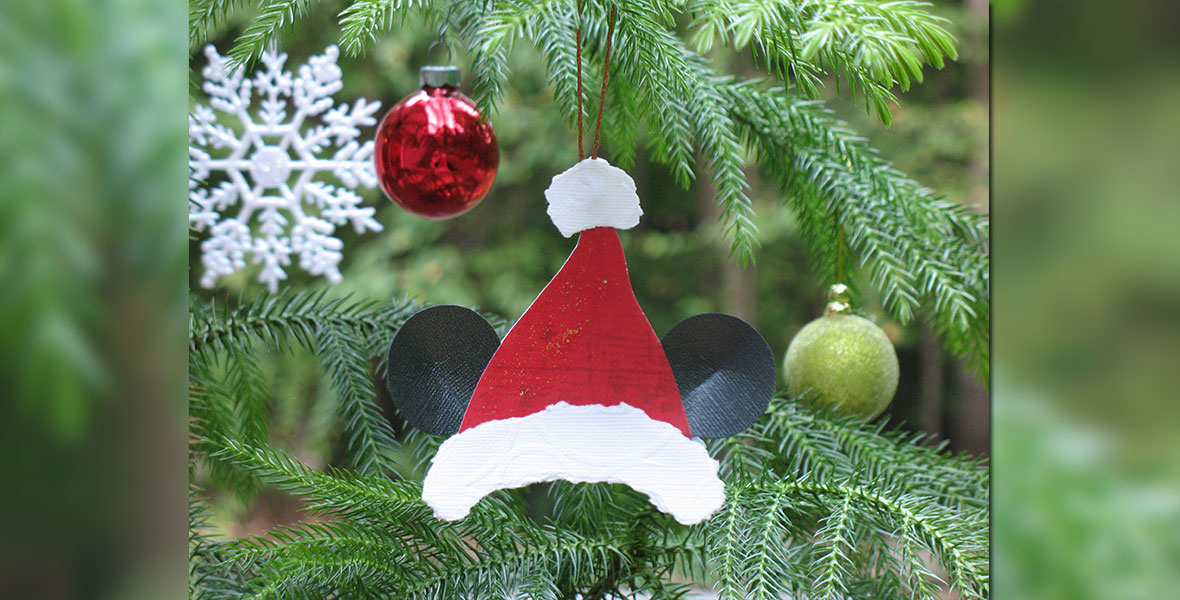
Round out your Christmas ornament collection with this festive paper spin-off of the signature mouse-eared beanie. To help make fashioning this ornament a snap, we whipped up an easy-to-use template for those of you who prefer to forego freestyle hand drawing. Click here to download the template.
When selecting paper for crafting your ornament, consider selecting paper with a subtle-patterned red for the hat and an embossed white for the trim — which will lend texture and dimension to the decoration. And for a sparkly finish, simply add a few brush strokes of glitter glue to reflect the tree lights.
Here’s what you will need:
Scrapbooking paper (red, white, and black)
Scissors
Pencil
Glue stick
Decorative thread, extra-thin cording, or monofilament (for hanging the ornament)
Mod Podge or similar glue sealer and small paintbrush or foam brush (optional)
Glitter glue (optional)
Instructions:
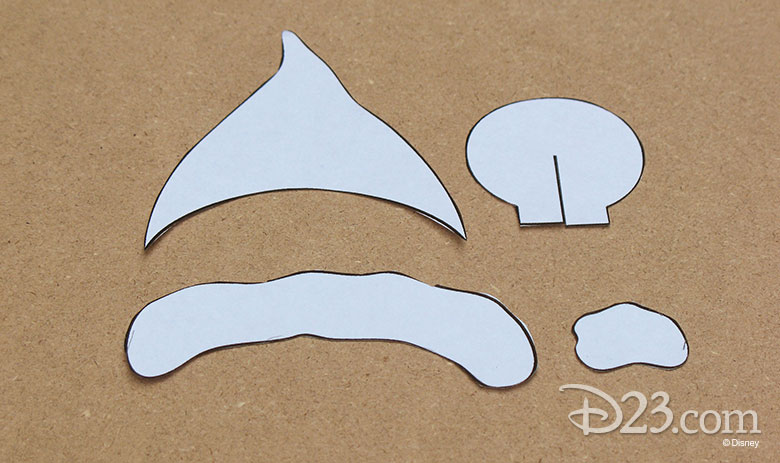
- To begin, download and print out the ornament template and cut out the pieces as shown below.
Another option is to draw template pieces freehand on scrap paper as follows:
- Santa-style Hat with a concave lower edge (2¾ inches wide at the base and about 3 inches high
- Hat Brim Trim (3¼ inches wide by ¾ inch thick and slightly arched to match the lower edge of the hat)
- Pompom (1 inch wide by ¾ inch high)
- Circular Mickey Ear (1½ inches wide with a ¾-inch-wide by ¼-inch-high rectangular base)
- Use the template pieces to cut two hat shapes out of red paper and two ears out of black paper. Keep in mind that you want the hat shapes to mirror each other (since you’ll be gluing them back-to-back). Consequently, if you’re using paper that’s printed on one side only, be sure to flip the template over before tracing it a second time.
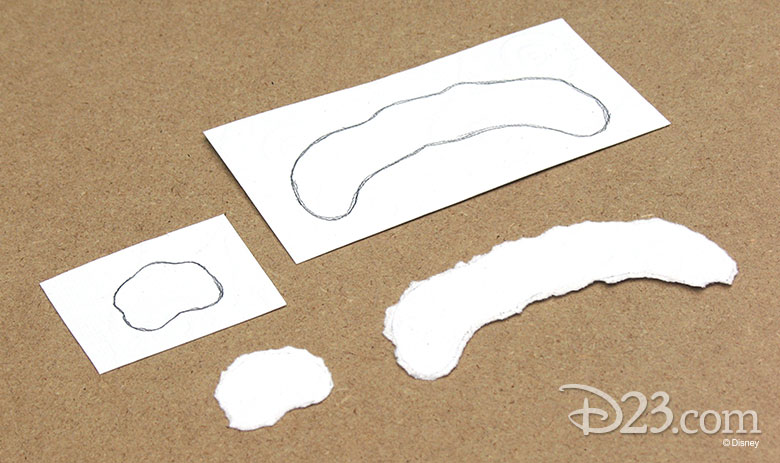
- Next, trace the hat brim trim twice onto white paper, but do not cut out the tracings. Do the same with the pompom. Now slowly tear the paper along the trace lines to give the trim pieces a feathery edge.
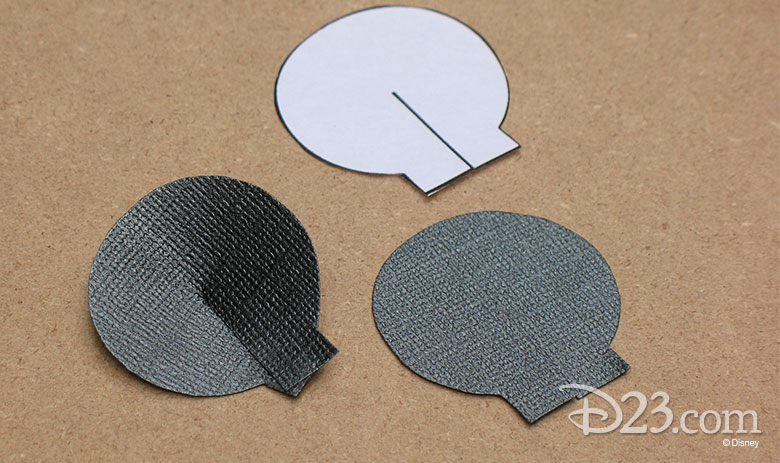
- On each ear, snip up through the center of the rectangular base to the middle of the circle. Then overlap the paper on the sides of the slit to create a slight cone shape, and use glue to secure it.
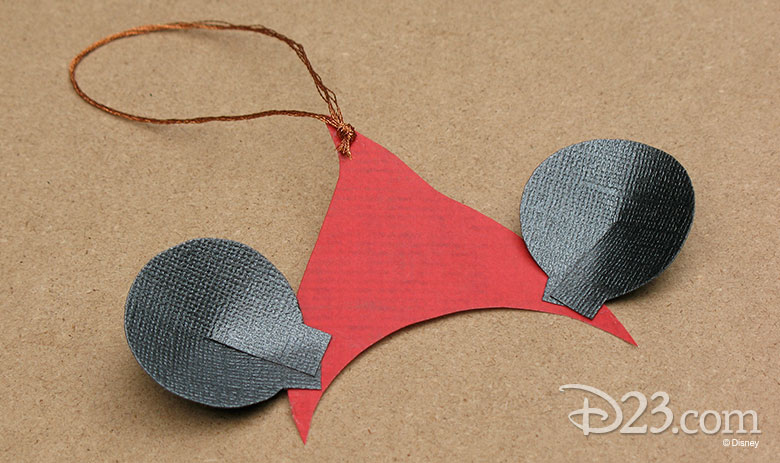
- Glue the ear bases to the lower sides of one of the hat shapes. Next, tie a piece of decorative thread into a loop (for hanging the ornament), and glue the knotted end to the tip of the hat.
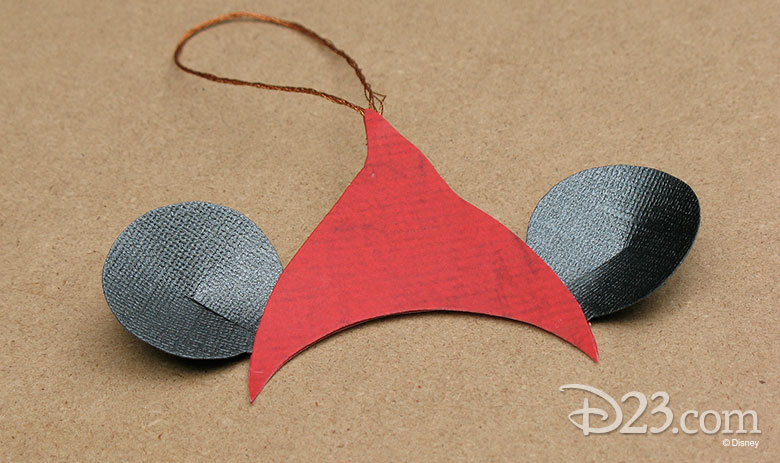
- Glue the second hat shape atop the first, matching up all the edges and sandwiching the ear bases and thread knot between them.
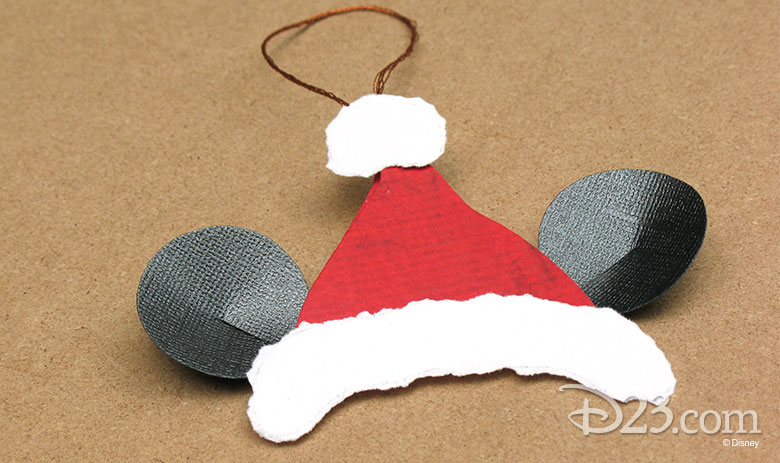
- Glue on the brim trim pieces back-to-back, sandwiching the bottom of the hat between them. Likewise, glue the pompom pieces to the tip of the hat.
- Seal the ornament by applying a coat of Mod Podge to the front and back. Once the sealer dries (this should take 10 to 15 minutes, depending on such factors as humidity), brush on a bit of glitter glue, if you like.