
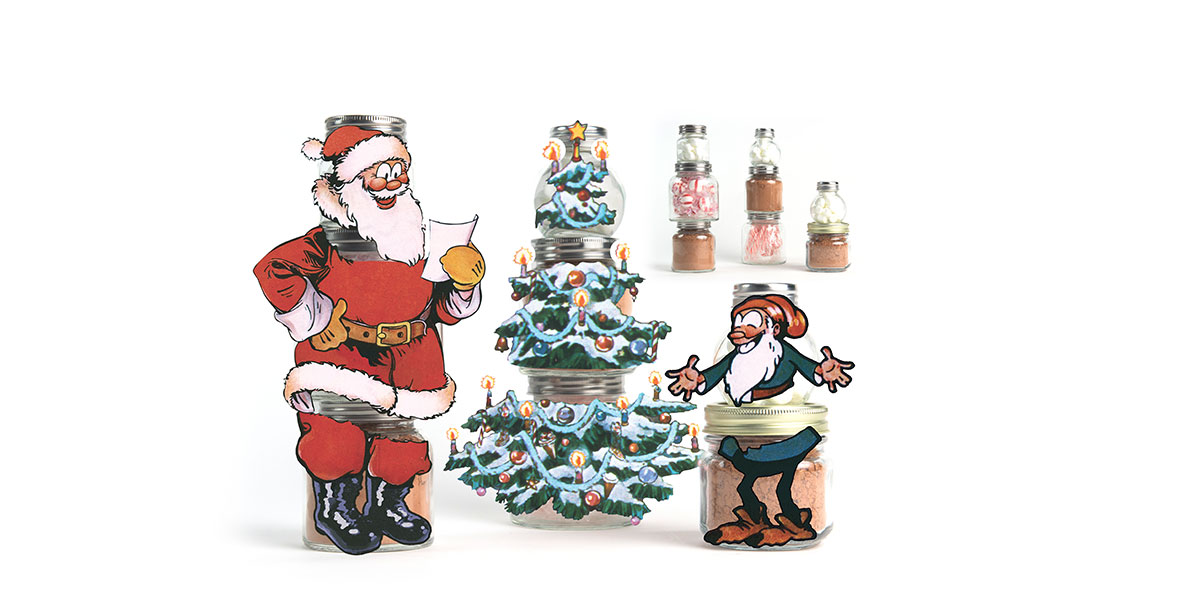
Santa’s Workshop, a Silly Symphony cartoon beloved by fans for decades, was first released December 10, 1932. Directed by Disney Legend Wilfred Jackson, the short follows Santa and his elves as they prepare for their yearly sleigh ride on Christmas Eve. Bring some of Santa’s magic in your home with our Silly Symphony Cocoa Jars Set! After assembling your jar characters, we won’t blame you one bit if you partake of a little hot cocoa… it’s what Santa would do!
Supplies:
8.5 x 11-inch white cardstock (printable)
Canister of hot cocoa mix, average size
Bag of mini-marshmallows, average size
Measuring spoon
Bag of mini candy canes or peppermints, average size
Eight (8) mason jars of varying sizes
Double-sided tape
Scissors or Exacto knife
Gorilla Glue
RECOMMENDED JAR SIZES (pictured above):
Tree top: 2.76 x 2.6 inch (smallest)
Tree mid: 3.4 x 2.9 inch (middle)
Tree bottom: 3.86 x 3.35 inch (largest)
Santa top: 2.48 x 2.17 inch (smallest)
Santa mid: 3.86 x 3.35 inch (largest)
Santa bottom: 3.4 x 2.9 inch (middle)
Elf top: 2.76 x 2.6 inch (smallest)
Elf bottom: 3 x3 inch (middle)
- Download and print out both sheets of images (Pages 1 and 2) onto your cardstock.
- With scissors—or an Exacto knife (make sure to use a cutting mat or other appropriate surface)—cut around every image on each page.
TREE:
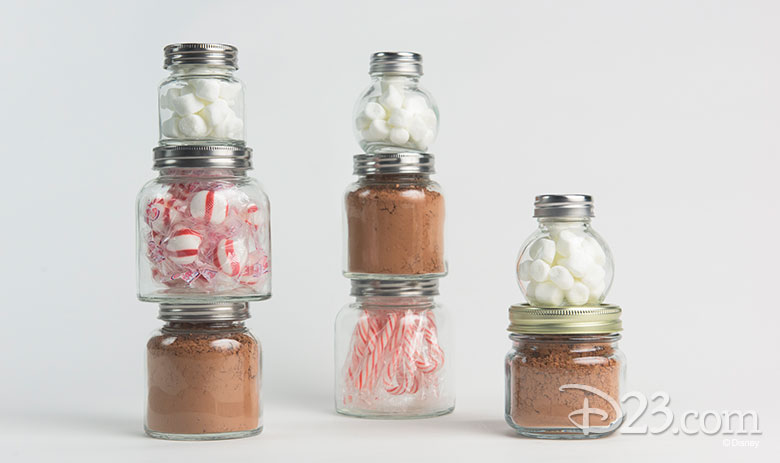
- Using your measuring spoon, fill the smallest mason jar with the mini marshmallows, then fill the middle-sized jar with the hot cocoa. Place your candy canes or peppermints in the largest jar. (Actual amounts will vary due to mason jar sizes.)
- Using double-sided tape, adhere the top section of your tree image to the front of the smallest jar; the middle section of the tree image to the front of the middle-sized jar; and the bottom section of the tree to the front of the largest jar.
SANTA:
- Repeat Step 3. (Actual amounts will vary due to mason jar sizes.)
- Using double-sided tape, adhere the top section of the Santa image (his face and hat) to the front of the smallest jar; the middle section of the Santa image to the front of your largest jar; and bottom section of the Santa image (his boots) to the front of the middle-sized jar.
ELF:
- Using your measuring spoon, fill your smallest mason jar with the mini marshmallows, then fill a middle-sized jar with the hot cocoa. (Actual amounts will vary due to Mason jar sizes.)
- Using double-sided tape, adhere the top section of the Elf image (his face and hat) to the front of the smallest jar, and the bottom section of the Elf image to the front of your middle-sized jar.
- Next, for each jar set, place them in their image’s correct order (see photos for details).
- For added stability, use the Gorilla Glue to adhere the glass bottom of the top jar to the screw-top of the middle jar, and the glass bottom of the middle jar to the screw-top of the bottom jar. (For the Elf character, you need only glue the glass bottom of the top jar to the screw-top of the bottom one.)
- Brew up a cup of hot cocoa and enjoy your Silly Symphony handiwork…
NOTE: Cutting—especially with an Exacto knife—should be done by an adult.