
What’s more festive than bringing Mickey and Minnie Mouse to your holiday celebration? They might not be able to attend in person—but you can light up your night with these candles inspired by our favorite animated duo… (Note: You can also use red, black, and yellow paper to create these looks.)
Supplies:
Red felt (18 x 12-inch sheet)
Black ribbon (3 yards of ⅞-inch wide)
Yellow ribbon (3 yards of ⅞-inch wide)
8mm round faux pearls
2 small white buttons (1-inch in diameter)
Small bows, 1 yellow and 1 black (approx. 2-inch wide each)
Mason jar candles (recommended: 12-ounce size)
Scissors
Hot glue gun
Permanent marker (i.e., Sharpie)
Ruler
- Take your sheet of red felt and wrap it, horizontally, around the candle to measure out desired circumference length (for a 12-ounce mason jar, that’s approximately 10.5 inches). Use your permanent marker and ruler to mark out where you need to cut.
- Next, cut two 3-inch-wide strips of felt—enough to wrap around the candle’s outer surface area, just inside the bevels seen at the top and bottom of the jar. (See photo for detail.) And don’t worry: You will end up with some leftover felt once you’re finished with this craft…
FOR THE MICKEY CANDLE:
- Apply hot glue to the front of the mason jar candle and place one of your red felt strips around the jar, using hot glue to seal it closed on the back edge. (Keep the side with any marker lines facing in.)
- Next, take your black ribbon, measure around the circumference of the candle, and cut to length (again, approximately 10.5 inches).
- Do the same for the yellow ribbon.
- Align the top edge of the black ribbon (horizontally) to the top of the red felt and hot glue in place—sealing the ends on the back with glue.
- Align the bottom edge of the yellow ribbon (horizontally) with the bottom of the red felt and hot glue in place—again sealing the ends on the back with glue.
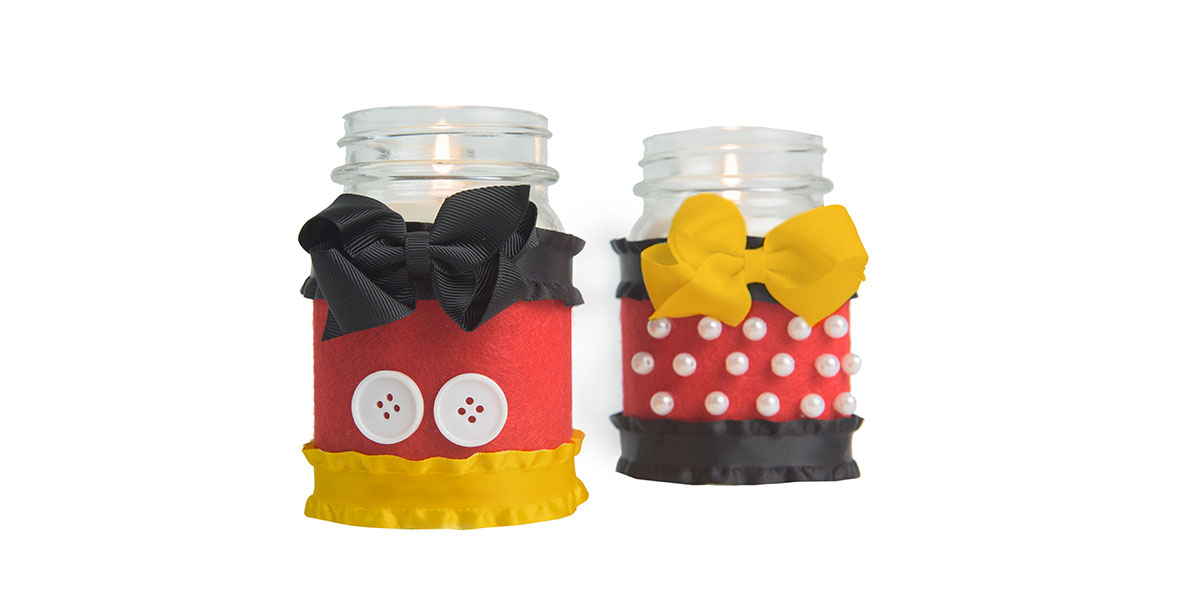
- Center the two white buttons on the lower half of the exposed red felt and hot glue in place. (See photo for details.)
FOR THE MINNIE CANDLE:
- Before gluing the 3-inch red felt strip around the second candle, lay it out on your work surface and visually measure out where you want to apply the pearls. (You can use your ruler and marker, if need be.) In our example, we applied five pearls in the first row; six in the second (offset with the top row); and five in the third (matching the top row). Allow to dry.
- Then, apply hot glue to the front of the mason jar candle and place the red felt strip around the jar, using hot glue to seal it closed on the back edge. (Keep the side with any marker lines facing in.)
- Take your black ribbon, measure around the circumference of the candle, and cut two pieces to length (again, approximately 10.5 inches).
- Align the top edge of one black ribbon piece (horizontally) to the top of the red felt and hot glue in place—sealing the ends on the back with glue.
- Align the bottom edge of the second black ribbon piece (horizontally) to the bottom of the red felt and hot glue in place—sealing the ends on the back with glue.
FOR BOTH CANDLES:
- Finish off the Mickey candle by attaching the small 2-inch black bow to the front of the jar lid with hot glue. (See photo for details.)
- Finish the Minnie candle by attaching the small 2-inch yellow bow to the front of the jar lid with hot glue. (See photo for details.)
BONUS TIP:
+ To get extra crafty, create your own small 2-inch bows!
NOTE: Cutting—and any hot gluing—should be done by an adult.