By D23 Team
Beauty and the Beast opens with an ethereally animated prologue; in it, an unseen narrator explains how a beautiful enchantress, a handsome—albeit selfish—prince, and a mystical flower set in motion this “tale as old as time.”
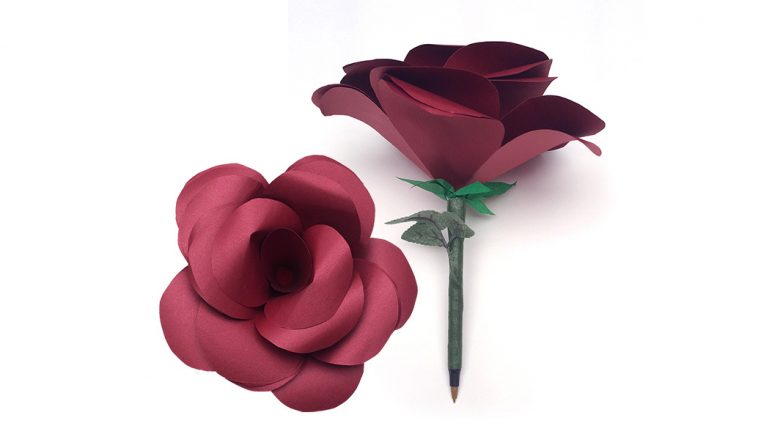
The flower in question, an Enchanted Rose, has become a sort of symbol for Beauty and the Beast over the years—seen in Disney Parks around the world. Want your own Enchanted Rose? Our version doubles as a pen… which you can use at your very own Fanniversary party!
Supplies:
Red construction paper (6 sheets)
8.5 x 11-inch white printer paper (to print out templates)
Green tissue paper
Green floral tape (found at craft stores)
One (1) small red “pom pom” puff ball (found at craft stores)
Ballpoint pen
Scissors
Adhesive tape
Hot glue gun
Glue stick
OPTIONAL:
Stapler
Small silk leaves (found at craft stores)
Plastic “pearl” OR colored “gem” (found at craft stores)
- Download and print out the Enchanted Rose template (Page 1) onto one sheet of white printer paper.
- With your scissors, cut out the guide from the template. Then, use the guide to cut that same shape from your six pieces of red construction paper.
NOTE: If you don’t want to cut out one shape at a time, use the (optional) stapler to staple the guide shape (at its center) to three sheets of the construction paper, to help handle them better while cutting. Repeat for the other three sheets. Make sure to remove any staple(s) before moving on to the next step…
PROCESS CHECK! You should now have six (6) red “flower” patterns. Each shape within the pattern (as denoted by the lines on the template) represents a “petal.”
- Using the template picture as a guide, take two of your flower patterns and cut a line from one inner edge to the center. Take another two flower patterns and cut out a single teardrop “petal.” Next, take another flower pattern and cut a two-teardrop petal. Finally, take your last flower pattern and cut it in in half. (See photo for example of each.)
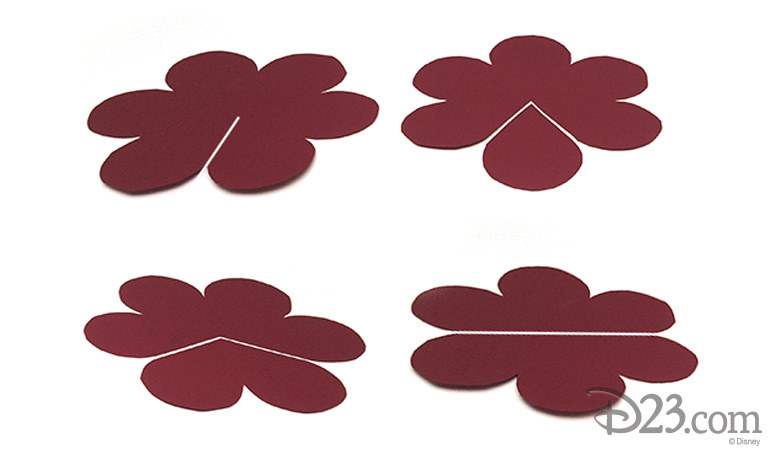
PROCESS CHECK! From what you’ve just cut, here’s what you’ll need for the rose:
One (1) single petal
One (1) three-petal set
One (1) four-petal set
Two (2) five-petal sets
Two (2) full six-petal sets (with just a line cut into them)
You may have some leftover petals; don’t worry.
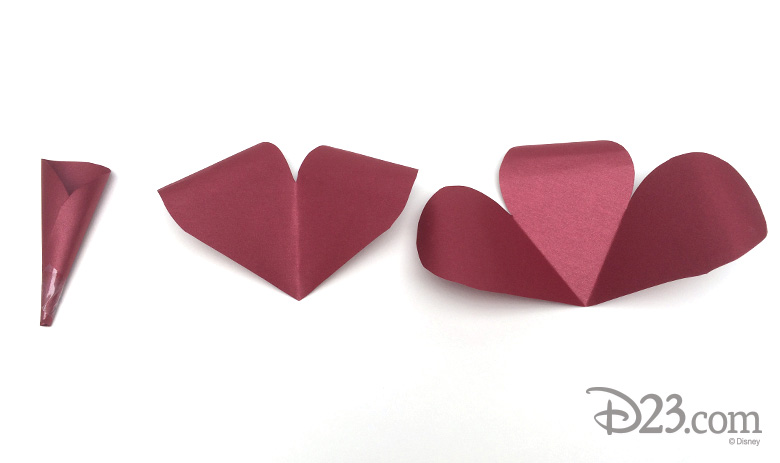
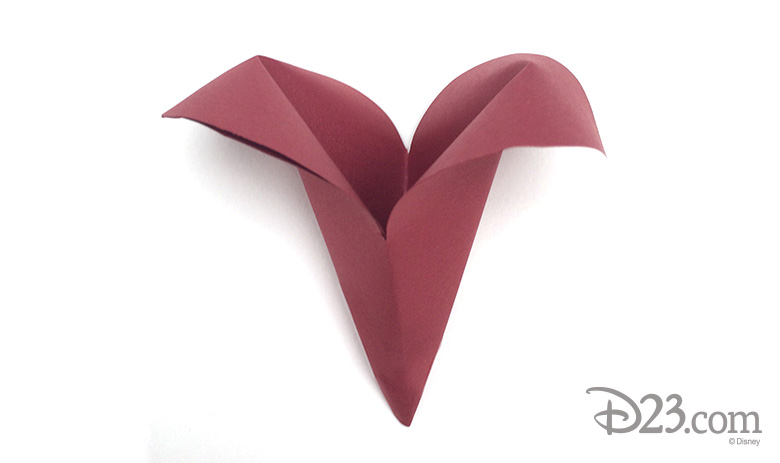
- Take your single petal and roll it into a cone; use your adhesive tape to keep it closed. Next, take your three-petals set and fold the two outer petals inwards—with one over the other, lining them up to create a bigger cone. Use glue stick to glue the two outer petals together. (See photos for detail.)
- Take your four-petal set and fold it in half first; then, fold the two (2) outer petals inward—with one over the other, lining them up to create an even larger cone. Use the glue stick to glue the two outer petals together.
- Next, for each five-petal set, fold an outer petal inward (lining it up with the petal next to it), and continue the same fold with every petal—all the way around. Unfold each to reveal a “creased” sheet, then fold one outer petal over the other outer petal and use the glue stick to glue together into a cone.
- For each six-petal set, repeat the same process—folding an outer petal inward (lining it up with the petal next to it), and continue the same fold with every petal all the way around. Unfold each to reveal a “creased” sheet, then fold one (1) outer petal over the other outer petal and use the glue stick to glue together into a cone.
- Use the ballpoint pen to curl the round tops of each petal outward by wrapping the paper slightly around the pen. (See photos for detail.)
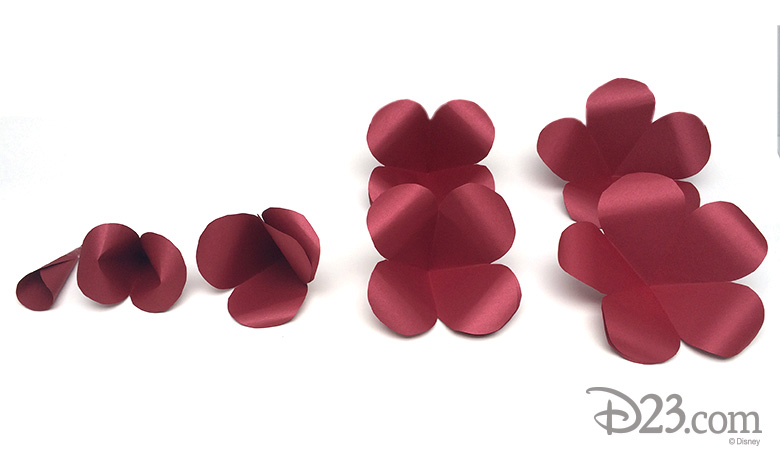
PROCESS CHECK! At this point, you should have:
One (1) single cone
One (1) cone with two full petals
One (1) cone with three full petals
Two (2) cones with four petals
Two (2) cones with five petals. (See photo for detail on each final petal set.)
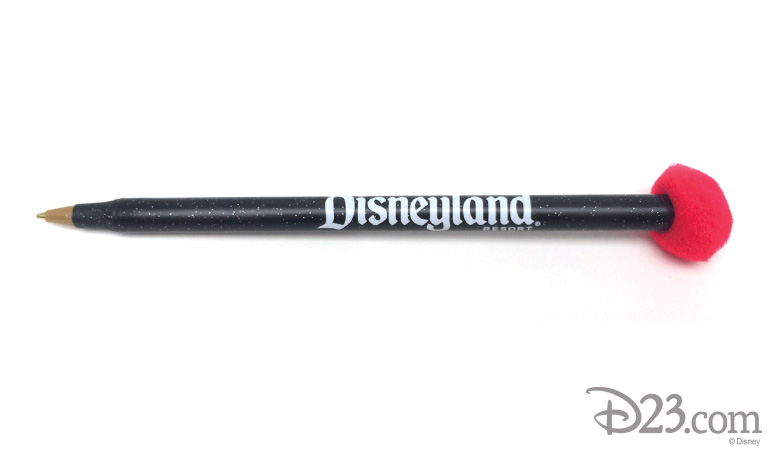
- With your hot glue gun, attach your small red “pom pom” puff ball to the top of your pen (not the ballpoint end). OPTIONAL: Instead of the “pom pom,” you could attach a glistening plastic “pearl” or even a shimmering colored “gem.” This will be the center of your Enchanted Rose. (See photo for detail.)
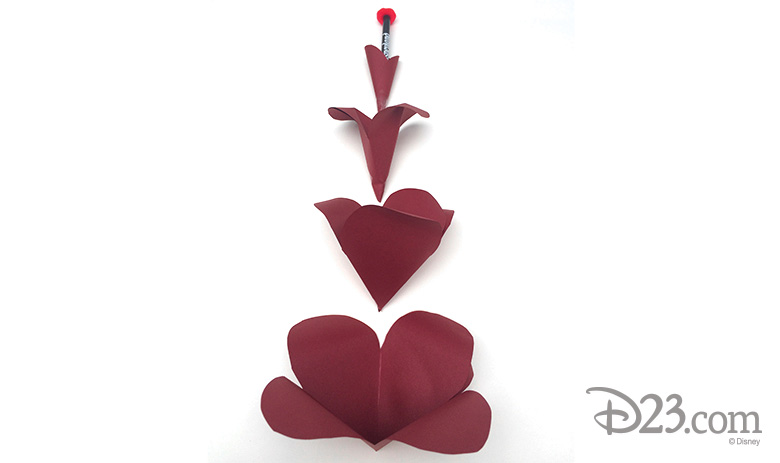
- Stack your petal cones within themselves—the five-petal sets at the bottom—until you insert the final smallest “cone.” Thread the pen through all the petal sets, until they’re resting on the upper half of the pen. (If the pen doesn’t fit through the “points” of each petal cone, use your scissors to cut a slightly bigger hole.) (See photo for detail.)
NOTE: Any extra petals can be used to “fill out” the rose.
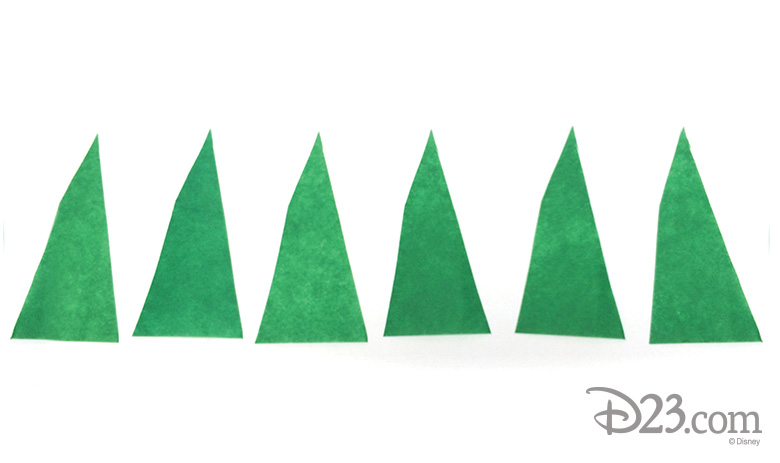
- Cut six (6) 2-inch triangles (with a 1/2-inch base) from your green tissue paper; fold the outer corners of the base in to create a “leaf.” Line six of your “leaves” around the base of the flower and attach with the glue stick. (See photos for detail.)
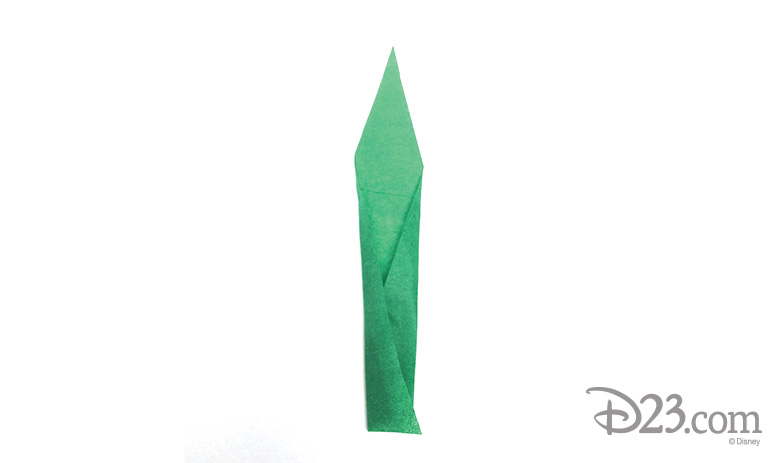
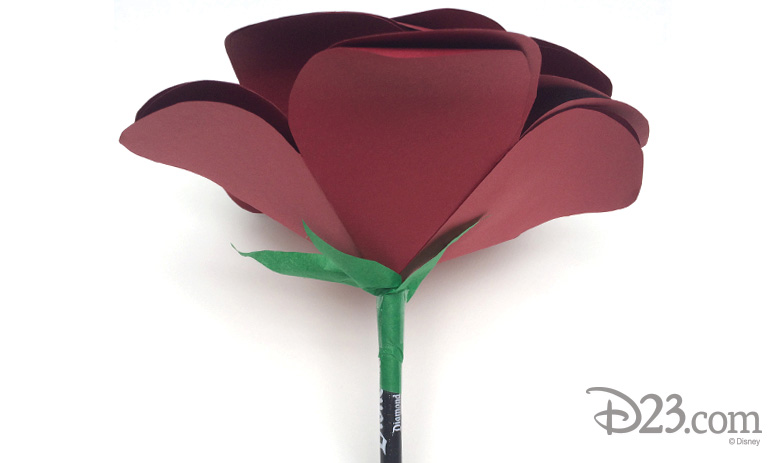
- Take the green floral tape and wrap it around the pen, starting at the top (around the edges of your green tissue “leaves”) and wrapping all the way down towards the bottom. Make sure not to cover up the writing/ballpoint end of your pen! NOTE: Use the (optional) silk leaves to add the “stalk” of your rose. (See photo for detail.)
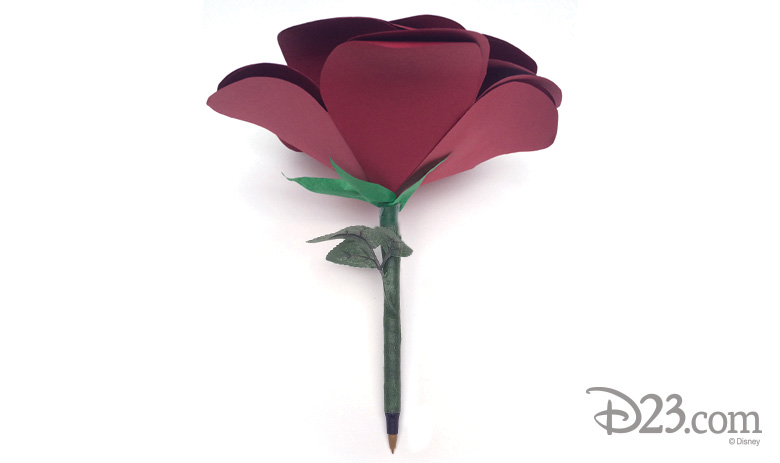
Voila! You now have your own Enchanted Rose Pen!
NOTE: Cutting with sharp scissors—and any hot gluing—should be done by an adult.